22 Zombie Halloween Decorations Terrifying Party Ideas
A single reaching hand can make guests stop at the door. These zombie halloween decorations bring that spine-tingling moment to life without demanding a huge budget. Even a plain porch, hallway, or buffet table can become part of your undead party scene.
Inside, you’ll find 22 ideas, from crawling lawn zombies and glowing pumpkin heads to quarantine photo walls and creepy dining details. Each one includes practical touches you can adapt to your space, whether you’re decorating a small apartment or a whole front yard.
The secret is often placement, not the number of props. A shadow near an entryway or a trail of footprints can be more memorable than a crowded display. Choose a few favorites, check that walkways stay clear, and get ready for plenty of photo-worthy reactions.
Zombie Graveyard Walkway

Guests will slow down the moment they spot a zombie rising beside the walkway. Arrange three lightweight foam tombstones at different angles, then tuck a crouching figure behind the largest marker. Add a broken fence panel or bare branches to make the entrance feel like a forgotten cemetery.
Keep the middle of the path completely clear, especially after dark. Aim two battery-powered amber lights upward across the props and scatter a few dry leaves around their bases. For zombie halloween decorations that photograph well, place the most detailed face nearest the porch light, not the street.
Crawling Zombie Lawn

- Those reaching hands should look freshly unearthed. Set plastic hands at different heights using short garden stakes.
- Hide a lightweight zombie torso behind a shallow mulch mound rather than digging into the lawn.
- Slip torn old sleeves over exposed arms and dab washable brown paint onto the cuffs.
- Place a dim, outdoor-rated green spotlight to one side so the shadows stretch across the grass.
- Anchor every prop securely, and keep stakes outside the walking route to prevent trips.
The creepiest lawn scenes reveal just enough of the monster to make guests look twice. Cluster your crawling figures near one garden bed instead of spreading them across the whole yard. Leave an open patch of grass around the display so the muddy hands stand out in photos.
Zombie Quarantine Photo Wall

Quick Tip:
Even a plain wall can look like an outbreak checkpoint with one oversized QUARANTINE sign. Cross strips of yellow caution tape around its edges, leaving the middle open for faces.
A quarantine backdrop gives guests a photo spot that feels connected to the party theme. Leave a clear center between warning signs, then set a washable face-paint kit or cardboard ID tags nearby. Keep tape away from doorways and ensure the lights brighten faces without washing out the distressed details.
Zombie Specimen Jars
BEFORE:
A plain bookshelf can make a zombie-themed party feel unfinished, even with decorations elsewhere. Random bottles and ordinary household objects rarely create the creepy laboratory atmosphere guests expect.
AFTER:
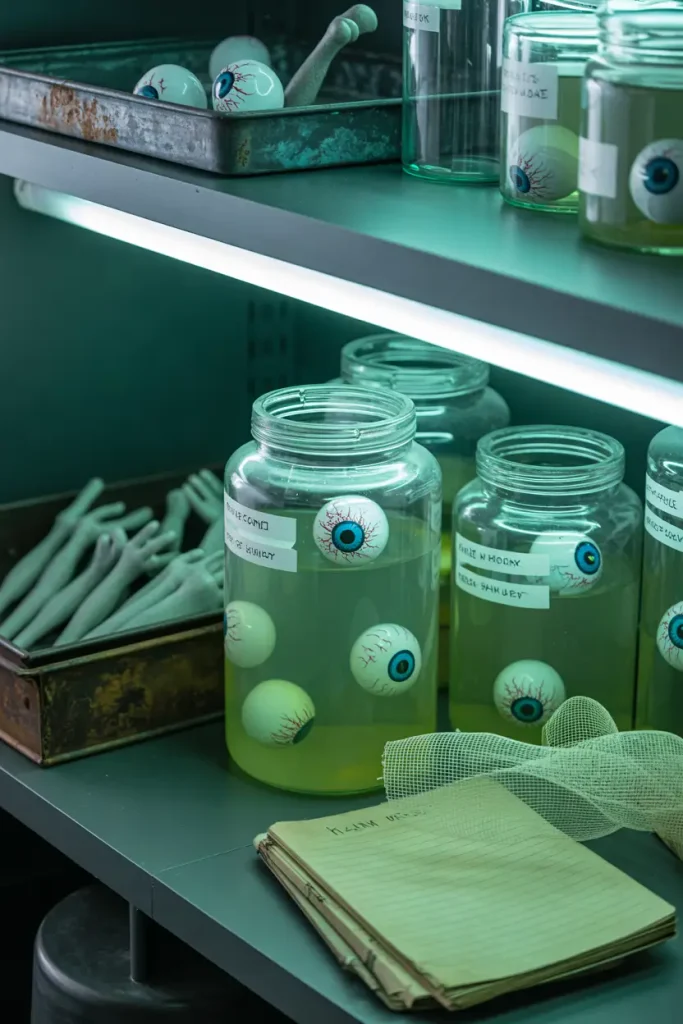
Replace the clutter with sealed specimen jars filled with tinted water and rubber body parts. Add stained paper labels, a metal-look tray, and a small green LED light behind the display. The shelf now resembles evidence from a mysterious zombie experiment.
Use clear plastic containers instead of glass wherever guests might bump the display. A few drops of food coloring give water a murky tint, while torn gauze hides inexpensive prop edges. Keep these jars separate from refreshments, and label them clearly as decorations to avoid confusion.
Boarded Zombie Windows

- Create Creepy Silhouettes: Make your windows look occupied by the undead before guests reach the door. Cut zombie heads and reaching hands from thick black cardstock.
- Make Faux Wooden Boards: Cut lightweight foam board into uneven strips. Paint them brown and dry-brush gray over the surface for an aged appearance.
- Arrange the Window Display: Attach silhouettes and faux boards using removable adhesive suitable for your window frames. Keep emergency escape windows completely unobstructed.
- Add Eerie Backlighting: Place battery-powered green LED lights behind the silhouettes. Test the arrangement from outside after sunset to check the effect.
Dark windows with reaching zombie hands create suspense without requiring expensive animated props. The contrast between black silhouettes and green lighting makes the scene visible from the street. For a stronger result, decorate two nearby windows differently so the figures appear to be moving through separate rooms.
Zombie Feast Table

| Design Detail | Basic Party Table | Zombie Feast Table |
|---|---|---|
| Table Covering | Plain black tablecloth | Torn gray gauze layered over black fabric |
| Centerpiece | Standard Halloween pumpkins | Fake zombie hand inside a covered specimen container |
| Food Labels | Ordinary paper cards | Aged cards with creepy outbreak-inspired names |
| Lighting | Bright overhead lights | Warm lighting with subtle green accents |
| Tableware | Regular plates and napkins | Matte black plates with dark red napkins |
A buffet becomes more memorable when every detail supports the spooky theme. Keep serving dishes clean and separate from fake blood, paint, or decorative body parts. Use food-safe containers for snacks and washable trays beneath messy treats. The result feels wonderfully creepy while remaining comfortable for guests to enjoy.
Explore More: 22 Amazing Halloween Party and Home Decorating Ideas
Zombie Hand Wreath

DO:
- Make visitors hesitate at the door by fastening three lightweight zombie hands to a grapevine wreath with floral wire.
- Weave torn gray gauze between branches, keeping loose ends short.
- Brush olive and brown paint onto the hands for muddy detail.
- Hang the wreath on a secure, removable door hook.
DON’T:
- Don’t use heavy props that could pull the hook loose.
- Don’t cover the peephole, lock, or house number.
- Don’t leave sharp wire ends where guests can touch them.
- Don’t let fabric trail into the doorway.
Zombie hands reaching through tangled vines create a striking detail without taking over the entire porch. Choose one oversized hand near the top and two smaller ones along the side for an uneven, lifelike arrangement. A tiny warm light above the wreath brings out the cracked paint after sunset.
Zombie Staircase Shadows

Result: A creeping procession of undead silhouettes appears to climb the staircase wall.
Cost: Low, especially with leftover black cardstock and removable tape.
Time: About 30 minutes to cut and position the shapes.
Best For: Indoor staircases with a plain wall and a clear landing.
Guests naturally look toward a staircase, which makes the wall a clever place for eerie movement. Tape paper silhouettes to the wall with removable mounting strips, then shine an LED upward from a safe landing. Keep steps, handrails, and switches completely clear so the spooky effect never creates a tripping risk.
Discover More: 22 Halloween Haunted House Decorations to Create a Truly Eerie Home
Infected Bathroom Mirror

A bathroom mirror streaked with eerie handprints can surprise guests where they least expect a scare. Use washable window markers to draw a few dragging fingerprints across one corner, then place a small battery-powered red LED beside the sink. Keep the center of the mirror clear for normal use.
A folded gray hand towel, an infected warning card, and a tiny faux bandage bundle carry the theme across the counter. Test all marks on an inconspicuous spot first and avoid spraying liquids near electrical outlets. Small, contained details feel convincing and make cleanup manageable after the party.
Zombie Escape Fence
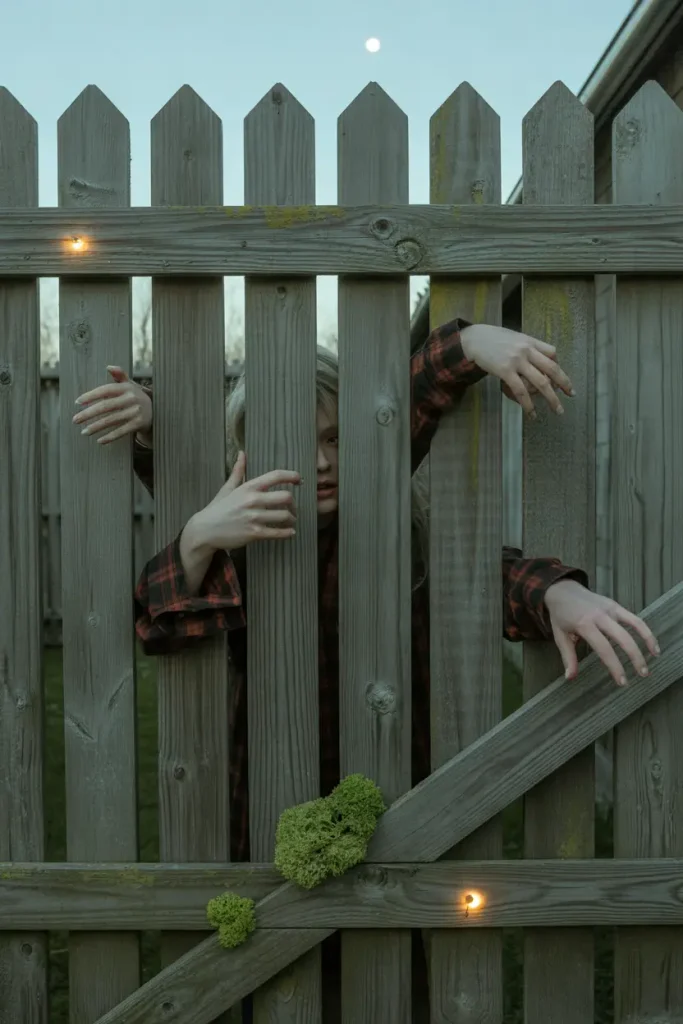
- A hand gripping the fence will catch guests off guard before they notice the rest of the display. Choose soft foam hands with flexible fingers.
- Secure each hand to the fence using removable outdoor ties or clips that won’t damage the wood.
- Wrap shredded flannel sleeves around the wrists to suggest zombies struggling to escape from the other side.
- Tuck artificial moss and weathered fabric between the fence rails to create a neglected, abandoned appearance.
- Position an outdoor-rated amber spotlight below the hands to cast dramatic shadows across the wooden surface.
The trick is making the hands seem attached to something hidden on the other side. Group them near a single fence post and vary their heights. For zombie halloween decorations that stand out in yard photos, leave the surrounding fence mostly bare and aim one light toward the reaching fingers.
Bloody Zombie Footprints

Quick Tip:
A trail of crimson footprints can make an ordinary hallway feel like part of a zombie outbreak. Start with small, scattered prints near the entrance, then gradually add heavier marks toward a closed door. Use removable floor decals instead of slippery fake blood.
Make the trail curve around a corner instead of running in a perfectly straight line. Mix full shoe prints with a few dragging marks for a more convincing escape route. Use removable, nonslip decals on smooth floors and test a hidden patch first to protect the finish during cleanup.
Zombie Containment Cage

BEFORE:
That empty corner beside the party room barely gets a second glance. A lone zombie cutout against the wall often looks flat and easy to overlook.
AFTER:
A faux containment cage gives the corner depth and a clear focal point. Black PVC bars, dark mesh, and a backlit zombie silhouette create the illusion of a creature trapped behind a security barrier.
Build the bars as a lightweight freestanding panel with a weighted base, rather than enclosing a real person. Place the zombie silhouette several inches behind the mesh to create depth. Keep the entire prop away from exits and walkways, then add a small quarantine sign for the finishing detail.
Zombie Outbreak Signposts
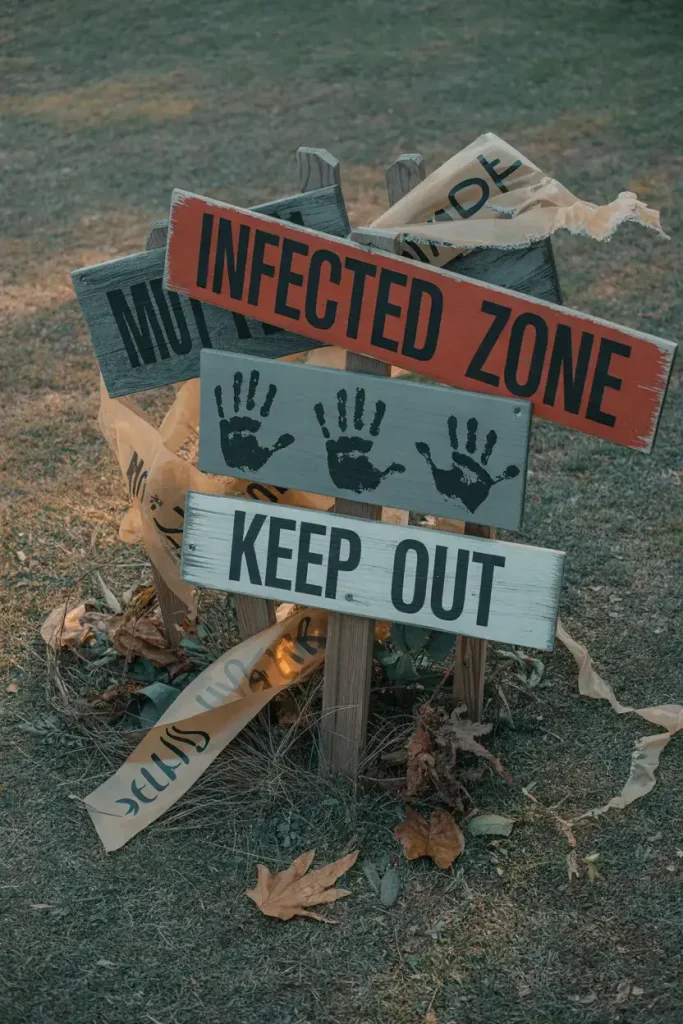
- Create Warning Arrows: Catch visitors’ attention with a crooked outbreak sign at the edge of your lawn. Cut three lightweight foam-board arrows into uneven shapes.
- Add Weathered Details: Paint the boards gray-brown, then dab on black smudges and muted red handprints. Let everything dry before adding lettering.
- Write Creepy Messages: Add short warnings such as “INFECTED ZONE” or “TURN BACK” using thick white paint markers. Point each arrow in a different direction.
- Secure the Display: Fasten the signs to a sturdy garden stake with outdoor-rated ties. Position the display away from walking paths.
Layering several warnings on one post makes the entrance feel like a deserted evacuation route without covering the yard in props. Keep the lettering bold enough to read from the sidewalk, and use one low, outdoor-rated LED light. A slightly tilted arrangement photographs better than perfectly aligned boards.
Zombie Wall Breakthrough

| Design Detail | Flat Zombie Decal | Layered Foam Breakthrough |
|---|---|---|
| Visual Effect | Simple wall silhouette | Realistic three-dimensional zombie escape |
| Materials | Removable vinyl sticker | Foam board, rubber arm, dark fabric |
| Lighting | Standard room lighting | Green LED behind the opening |
| Setup Time | Around 10 minutes | Approximately 45 to 60 minutes |
| Best Placement | Narrow hallways | Living room or party photo corner |
A zombie arm bursting through a wall makes a plain corner feel suddenly unsafe. For a rental-friendly setup, attach a removable faux plaster panel to a freestanding backdrop instead of damaging real drywall. Add dark fabric behind the opening to hide supports, and keep the foam edges soft around curious guests.
Undead Clothesline Display
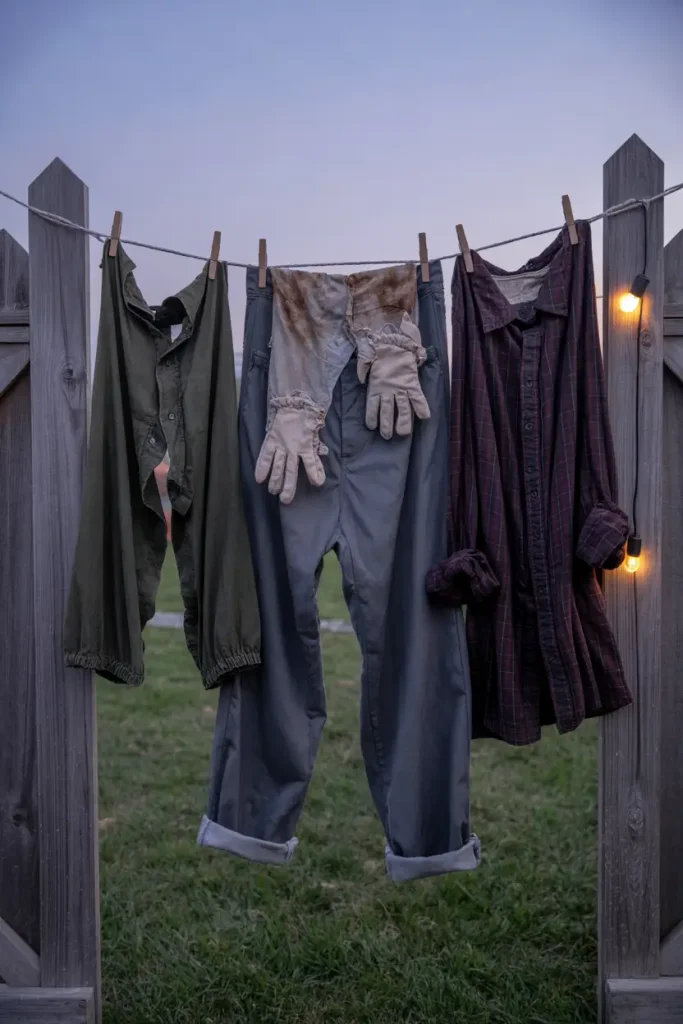
DO:
- Let shredded shirts hanging in the dark suggest that zombies have abandoned the backyard.
- Choose faded flannel shirts and old trousers for realistic, distressed clothing.
- Dab washable brown fabric paint around the hems to create muddy patches.
- Hang empty gloves from the sleeves to suggest dangling zombie hands.
DON’T:
- Don’t stretch the clothesline across walkways or emergency exits.
- Don’t overload weak fence posts with heavy, wet garments.
- Don’t place loose fabric near candles or other open flames.
- Don’t use fresh stains that might transfer onto guests’ clothing.
The empty sleeves moving in a light breeze give this display its unsettling charm. Space the garments unevenly and leave one gap where a zombie might have escaped. Hang everything above head height, use secure clips, and bring the fabrics inside during heavy rain or high winds to avoid a tangled mess.
Glowing Zombie Pumpkins

Result: A cluster of glowing zombie faces makes ordinary pumpkin decor look deliciously unsettling.
Cost: Low to moderate with reusable faux pumpkins and battery LED lights.
Time: About one hour for painting and assembling three heads.
Best For: Covered porches, entry tables, and sheltered patios.
Start with lightweight faux pumpkins and paint uneven olive patches around the eyes and mouth. Cut jagged teeth from black cardstock and attach them with removable adhesive. Use battery-powered LEDs instead of candles, especially near fabric or dry leaves. Cluster three heads at staggered heights for a stronger glow.
Zombie Mailbox Attack
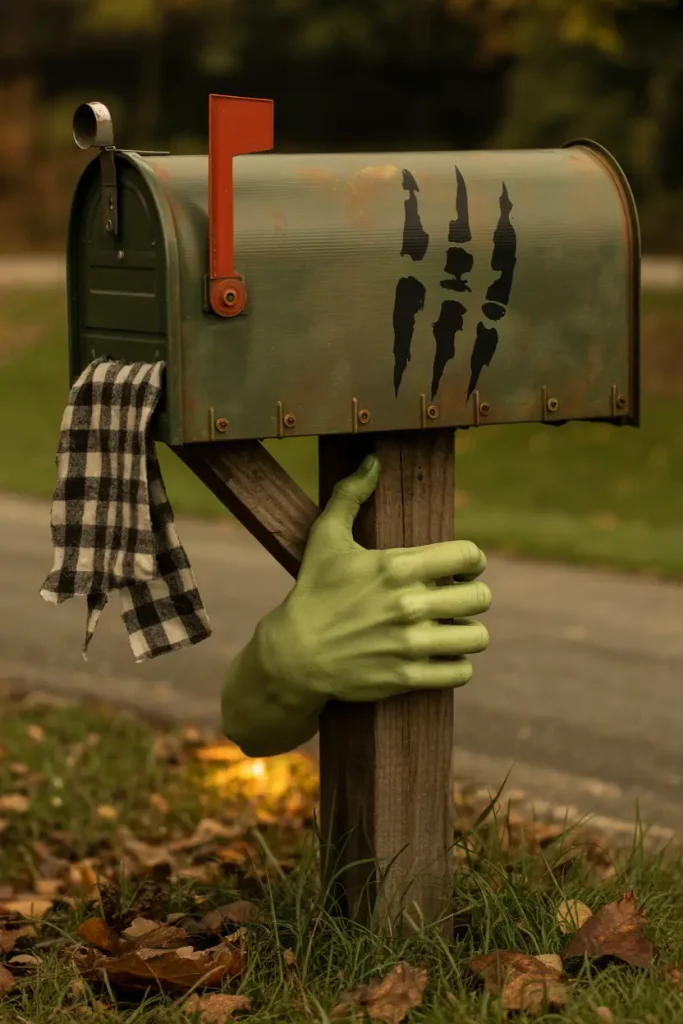
A mailbox that looks under attack gives the whole front yard a playful horror twist. Wrap a foam zombie hand around the post, then drape a strip of frayed shirt fabric beneath it. Add two fake claw marks to a removable paper sleeve, not the mailbox itself, to avoid damage.
Anchor the hand with outdoor-rated removable ties, keeping the flag, door, and address numbers completely visible. Place a low amber solar light nearby so neighbors notice the detail after dark. Since mail carriers still need easy access, position every prop well away from the delivery opening and street-facing approach.
Zombie Balloon Arch

- A crowd of zombie faces above the doorway makes an instant photo spot. Mix matte sage, gray, and white balloons instead of bright neon shades.
- Draw drooping eyelids and crooked mouths on inflated balloons with a suitable paint marker. Test a spare balloon first to prevent popping.
- Build the arch with a balloon strip and secure it to a freestanding frame. Keep the structure clear of the door swing.
- Add a few torn cheesecloth strips between clusters for a ragged, abandoned look. Keep strips short so they cannot snag clothing.
- Use battery-powered uplights at the base to cast eerie shadows. Avoid hot bulbs against latex.
Concentrate the largest balloon clusters on one side to create an uneven, outbreak-inspired shape. Smaller balloons fill gaps around the frame, while hand-drawn faces provide detail in close-up photographs. Put the arch indoors or under a sheltered entrance, since heat, wind, and rough surfaces can burst balloons quickly.
Zombie Ceiling Crawlers

Quick Tip:
Give the ceiling a creepy surprise without hanging heavy props overhead. Tape flat cardstock zombie silhouettes along the ceiling edge using removable adhesive approved for the surface. Keep every piece away from ceiling fans, sprinklers, and lights.
Position the figures so their hands seem to reach down the wall, then cast shadows with a cool LED placed on a stable shelf. The effect works especially well over a seating corner where guests can admire it from below. Test the adhesive first to avoid peeling paint.
Undead Dining Chairs
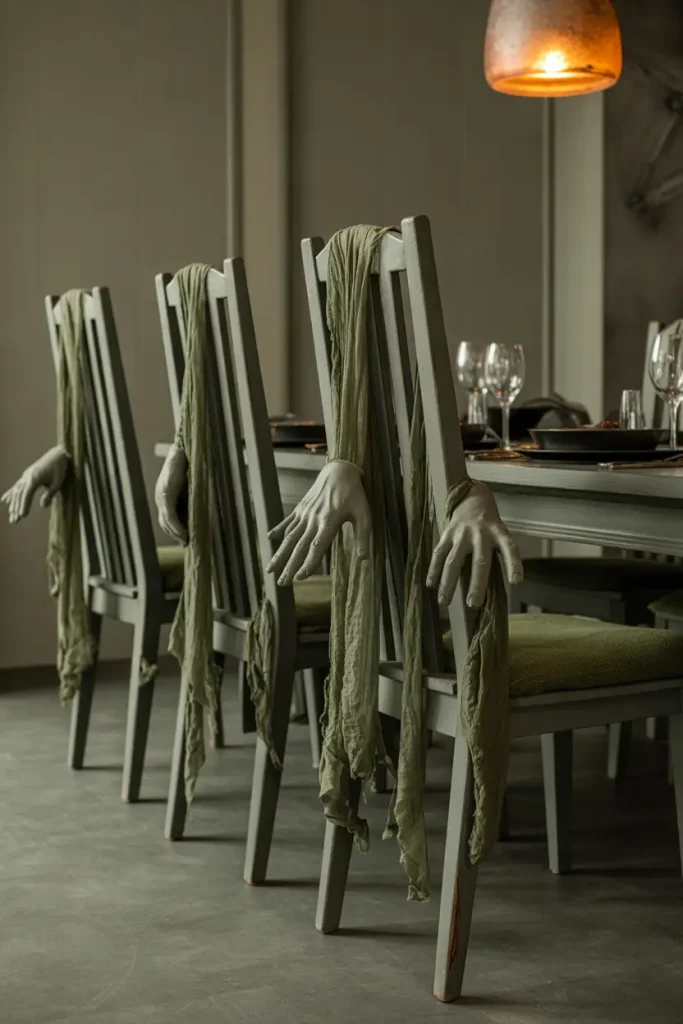
BEFORE:
Even the creepiest table setting falls flat when the chairs look forgotten. Plain chair backs leave the room feeling more like a regular dinner than a zombie gathering.
AFTER:
Each chair wears a distressed gray slipcover with ragged gauze and one soft zombie hand gripping the top rail. The seating area now matches the undead theme, even when no one is sitting at the table.
Use old pillowcases as loose chair-back covers, cutting small slits along the bottom edge for a worn look. Attach foam hands with removable fabric ties, not staples. Keep fabric clear of the floor and seat cushions so guests can pull out chairs comfortably and sit without snagging clothing.
Zombie Survival Station
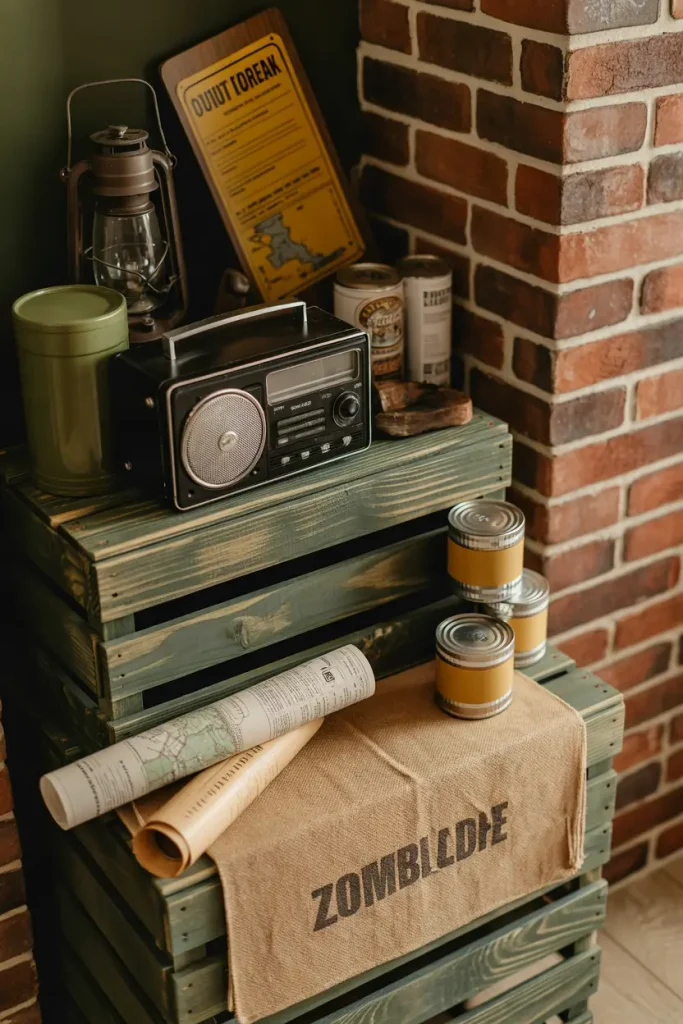
- Build the Supply Corner: An abandoned survival outpost makes guests wonder who escaped. Stack two small wooden crates securely against a wall.
- Arrange Emergency Props: Place a battery-powered lantern, old radio, folded map, and clearly decorative prop cans on the shelves.
- Create Warning Signs: Add a weathered cardboard sign labeled “EMERGENCY SUPPLIES” and a few rolled bandages tied with twine.
- Finish the Display: Position a folded canvas blanket beside the bottom crate, keeping everything away from the main walking route.
An emergency supply corner adds storytelling detail without requiring a large prop or expensive animatronics. Choose containers with dull, distressed finishes instead of shiny packaging. Keep any real first-aid supplies separate and accessible, especially at a crowded party. A warm lantern makes the station easy to notice in photos.
Zombie Shadow Projection
| Design Detail | Static Zombie Shadows | Moving Zombie Projection |
|---|---|---|
| Visual Effect | Fixed zombie silhouettes | Creeping, animated undead figures |
| Materials | Cardstock cutouts and LED lights | Projector and zombie animation loop |
| Atmosphere | Subtle haunted appearance | Dramatic outbreak-inspired movement |
| Best Placement | Indoor walls and windows | Garage doors and covered patios |
| Setup | Simple adhesive mounting | Projector positioning and focus adjustment |
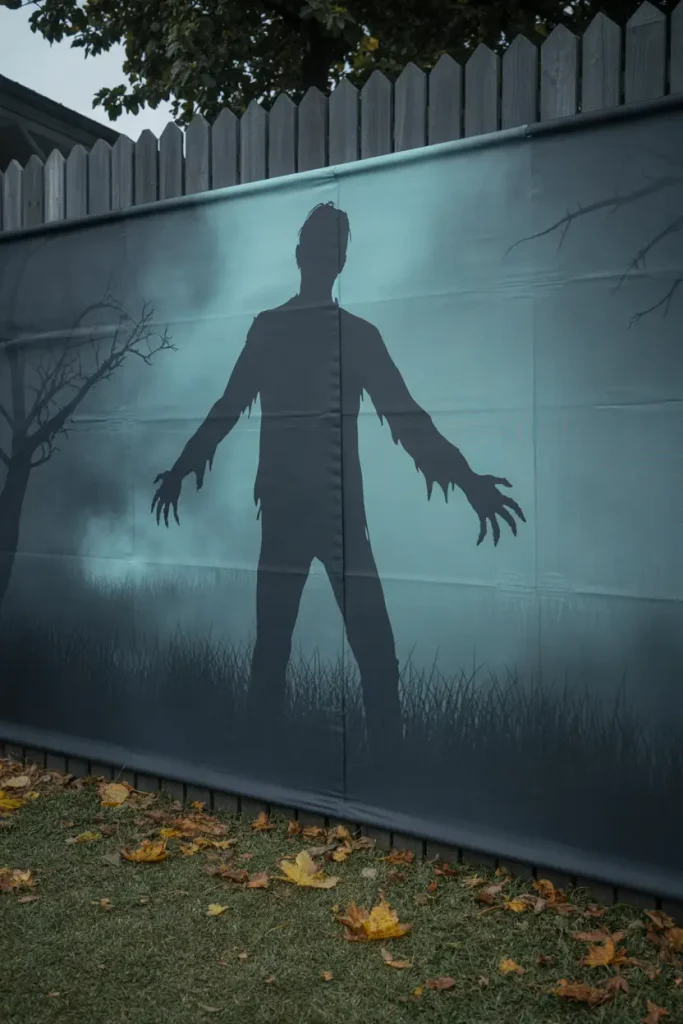
A giant zombie shadow crawling across the garage can make guests stop in their tracks. Position a weather-protected projector facing a plain wall and choose a slow-moving silhouette animation. Keep the light away from drivers and neighboring windows, and secure electrical cables so guests can move around safely.
Conclusion
The most memorable Halloween parties don’t depend on expensive props. A few well-placed zombie hands, shadowy lights, or homemade warning signs can give your home a wonderfully creepy atmosphere. Start with one spot guests will notice first, then build the scene with details that match your space and budget.
Use these zombie halloween decorations as a starting point, not a checklist. Pick one idea for this weekend or combine a few for a full undead party theme. Save this post on Pinterest so your favorites are easy to find, and share it with a friend planning their own Halloween gathering. Have fun making the scares your own!