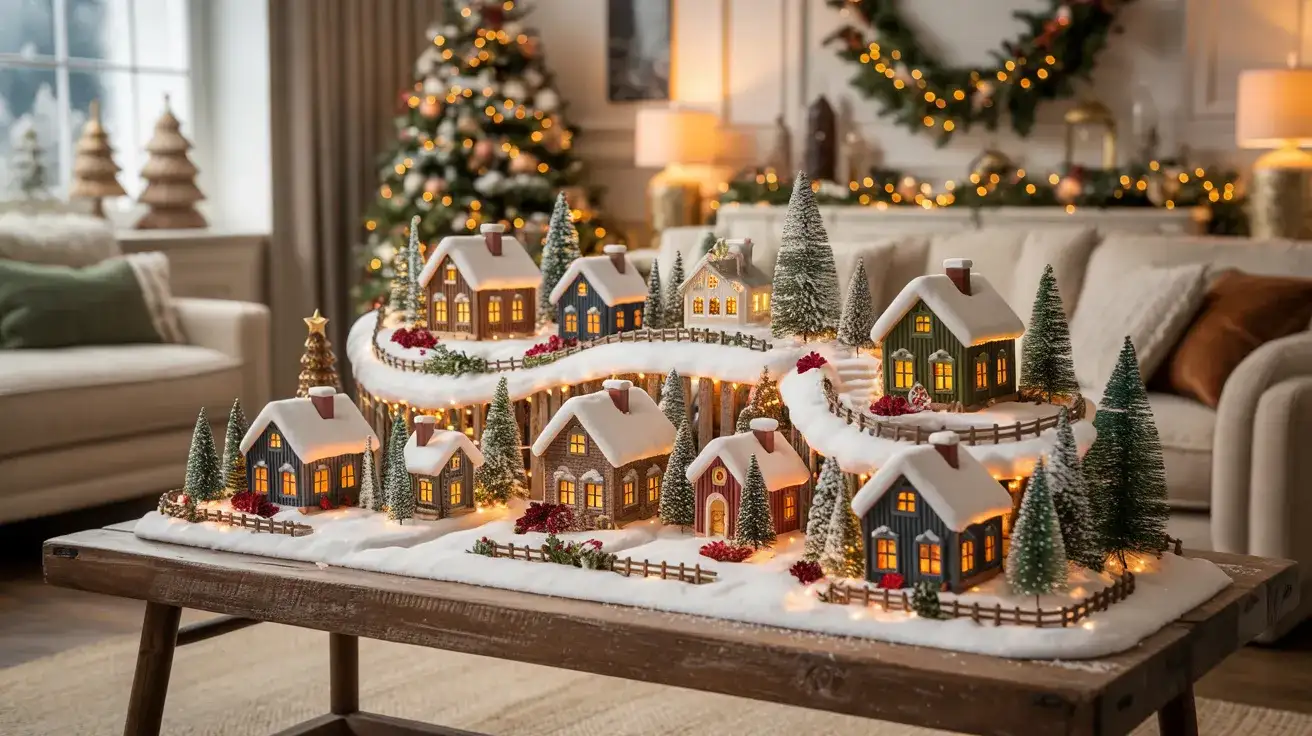
25 Christmas Village Display Ideas for a Magical Holiday Setup
Those tiny glowing houses can make even an ordinary shelf feel like a winter wonderland. The trick is knowing where to place them so your display feels magical, not crowded. These christmas village display ideas show how to style everything from a narrow windowsill to a dining table without buying a whole new collection.
You’ll find simple ways to layer snowy trees, hide light cords, add height, and make the most of pieces you already own. Small spaces can look just as charming as elaborate setups, especially when you choose a clear focal point and leave room around each cottage. Whether you love rustic wood, soft pastels, or classic red and green, there’s a display you can recreate at home and photograph for your holiday inspiration board.
Snowy Mantel Village
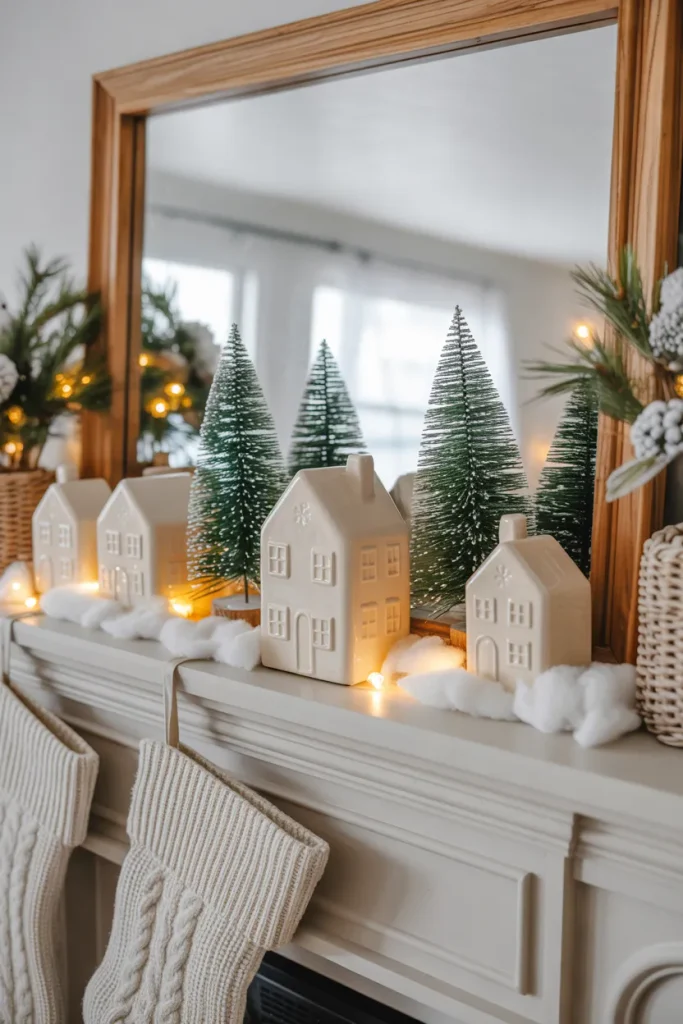
A glowing row of tiny cottages can make a plain fireplace mantel the focal point of your holiday decor. Start with five ceramic houses in mixed heights, putting the tallest slightly off center. Add clusters of bottlebrush trees between buildings, then tuck thin sheets of faux snow underneath.
For balanced christmas village display ideas, leave small gaps between rooftops and hide battery-operated LED lights behind the houses. Choose one warm light color so the village feels connected. Keep paper, faux snow, and wiring well away from fireplaces that produce heat. An unused mantel is safest.
Also View: 22 Christmas Mantel Decorating Ideas for Stunning Charm
Tiered Tray Village
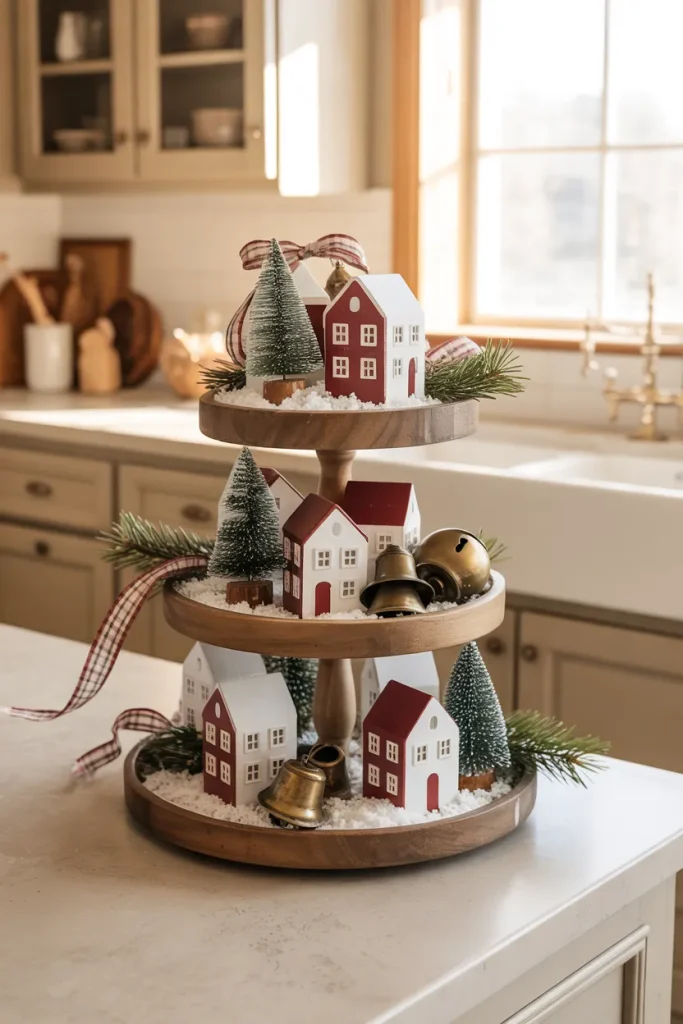
- A tiered tray creates a miniature neighborhood without sacrificing your entire countertop. Choose a sturdy tray with roomy shelves.
- Place two small cottages on the bottom tier and stagger their heights with a flat wooden riser.
- Fill the middle tier with bottlebrush trees and one tiny figurine to give the scene depth.
- Reserve the top tier for a single illuminated house so the display has a clear focal point.
- Use removable museum putty beneath lightweight pieces to help prevent accidental tipping.
Repeating cranberry red on each level makes the arrangement look coordinated even when the houses come from different sets. Leave part of each tier visible rather than covering every inch with snow. This compact setup suits coffee bars, entryway consoles, and kitchen corners that need a little holiday cheer.
Glowing Windowsill Village

Quick Tip:
A village on the windowsill looks especially magical at dusk, when its tiny windows glow against the dark glass. Choose battery-powered LED houses and keep them away from condensation, curtain fabric, and window latches.
Stagger the houses slightly instead of lining them up edge to edge, then place the shortest tree near the center to break up the rooflines. A white felt runner creates a snowy base without loose glitter. Measure your sill first, leaving room to open and close the window safely.
Bookshelf Village Display
BEFORE:
A bookshelf full of mismatched ornaments often looks busy rather than festive. When miniature houses sit at different depths beside ordinary clutter, their tiny details disappear.
AFTER:
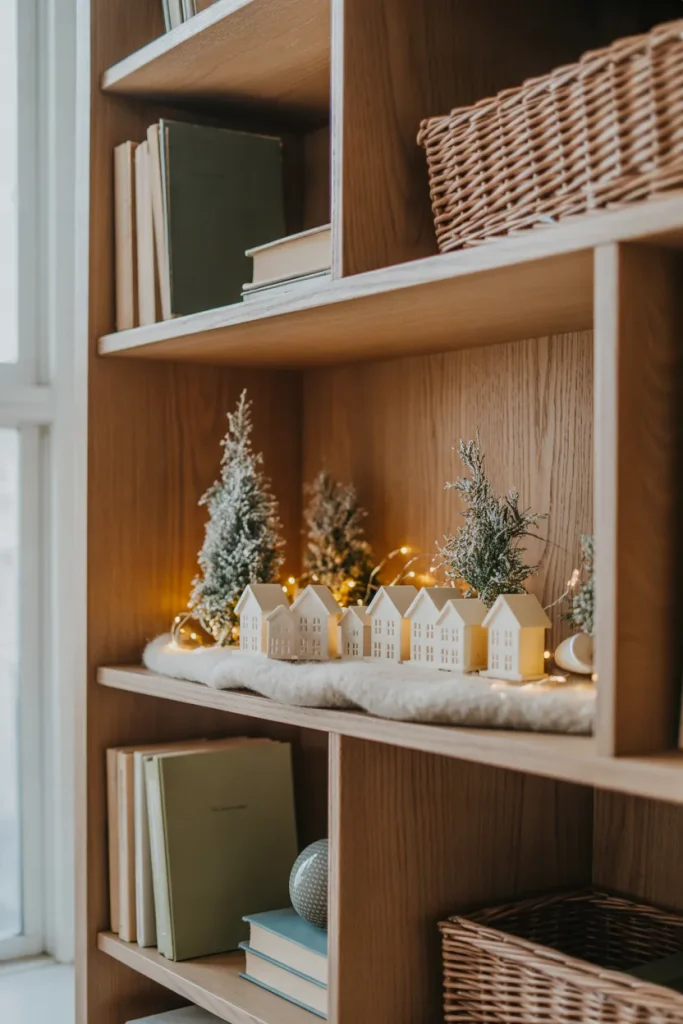
Clear one eye-level shelf and group three to five cottages in a shallow zigzag. Add miniature evergreens behind the rooflines and a strand of warm LED lights to give the little street a defined glow.
Keep your book collection on neighboring shelves so the display feels integrated, not staged. Use a felt strip to protect the wood, and raise one cottage on a stable, low block for height variation. Check that every house sits fully on the shelf, especially near the edge.
Glass Cloche Village
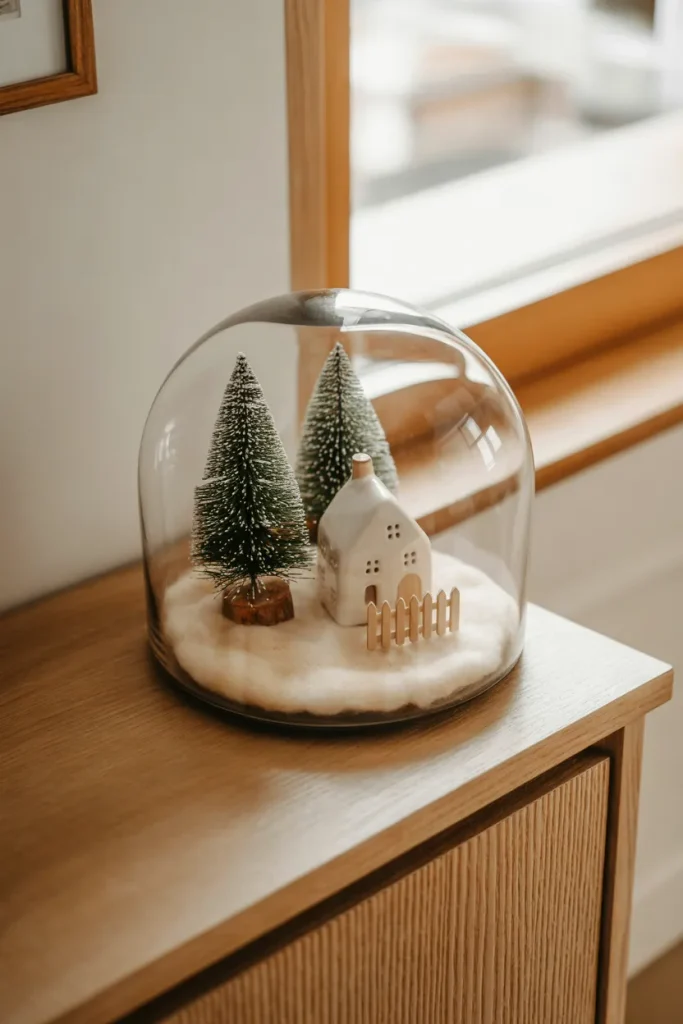
- Even a single tiny house can become a charming winter scene beneath a glass dome. Choose a cloche with a flat, sturdy base.
- Place a miniature ceramic cottage slightly toward the back, leaving room for decorations in front.
- Arrange two small bottlebrush trees beside the house and add a miniature fence for a cozy village setting.
- Cover the base with a thin layer of faux snow, then carefully lower the glass dome without disturbing the arrangement.
Choose a cloche with at least an inch of space around the tallest tree so nothing presses against the glass. This arrangement works well in small apartments because the decorations stay contained and easy to dust. For an evening glow, place a tiny battery LED inside before covering the scene.
Under Tree Village
| Detail | Flat Felt Base | Raised Platform |
|---|---|---|
| Visual Effect | Cozy, low snowy street | More visible rooftops |
| Setup | Lay white felt beneath houses | Place sturdy risers beneath felt |
| Best For | Small trees and open floors | Large trees with wrapped gifts |
| Storage | Fold and store easily | Stack risers and fold felt |
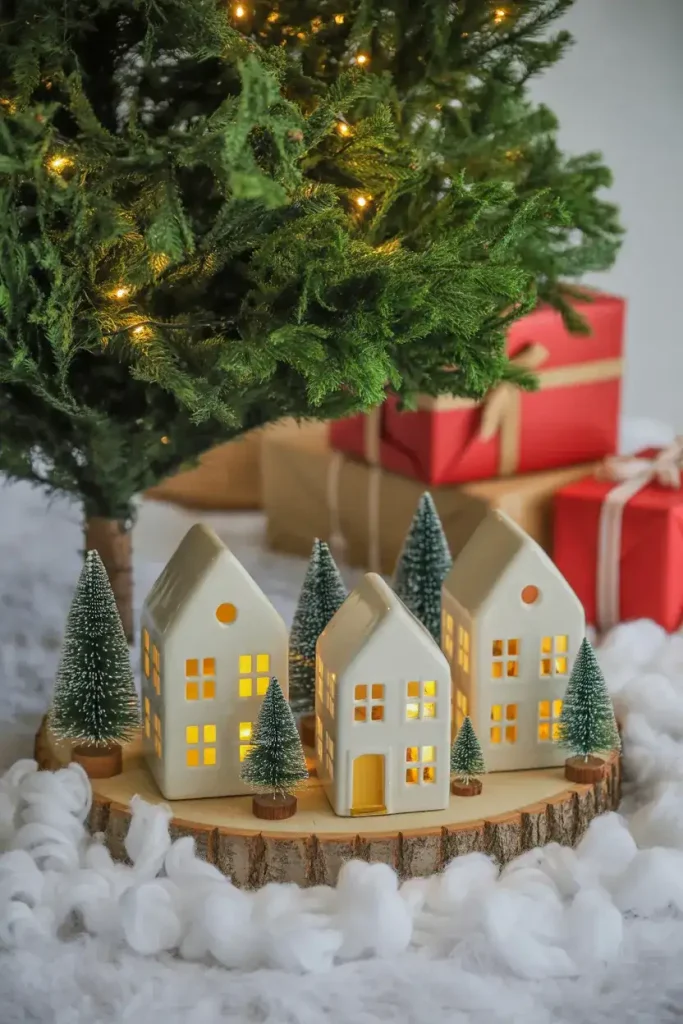
The space under your tree can become a miniature winter town instead of a pile of loose decorations. Choose a felt base for quick setup, or low wooden risers when gifts might block the houses. Keep buildings clear of the tree stand and watering area, and secure cords away from foot traffic.
Dining Table Village
DO:
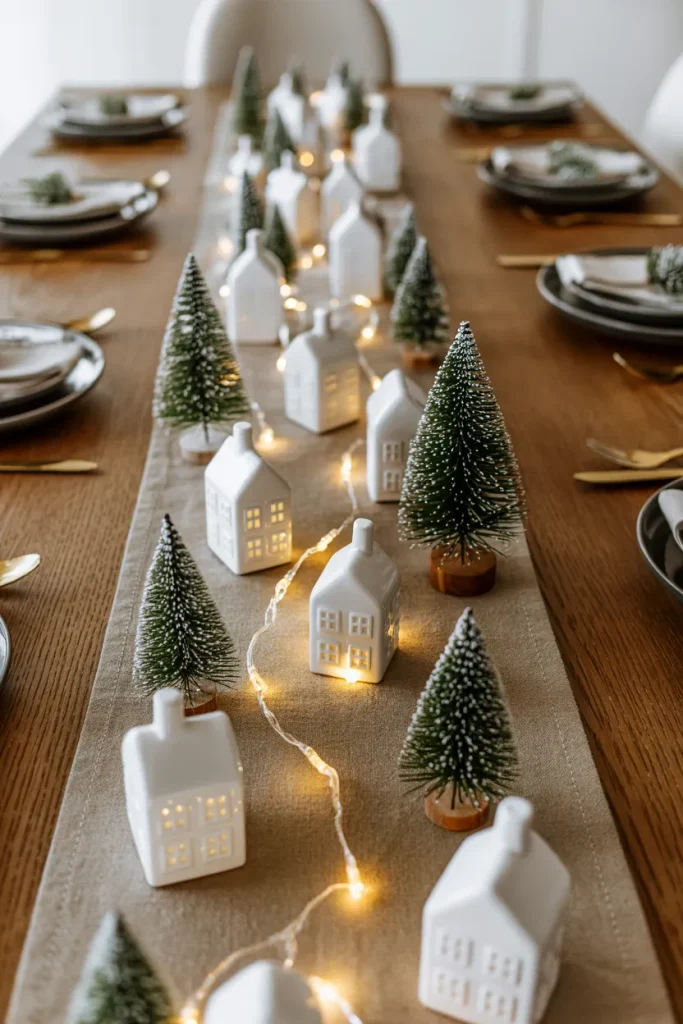
- Choose miniature cottages that create a charming holiday centerpiece without blocking conversation.
- Arrange houses along a neutral linen runner to define the village area.
- Place small evergreen trees between buildings to add natural texture and depth.
- Use battery-powered LED lights to create a warm glow during evening meals.
DON’T:
- Place tall decorations where they obstruct guests’ views across the table.
- Scatter loose artificial snow near plates, glasses, or serving dishes.
- Use real candles directly beside miniature houses or flammable decorations.
- Overcrowd the centerpiece with too many figurines and accessories.
A tiny holiday street can make dinner feel special without crowding the table. Keep every cottage below guests’ eye level, and arrange the village along the center rather than near place settings. For a longer table, repeat small trees between houses instead of filling every gap with ornaments.
Lantern Mini Village
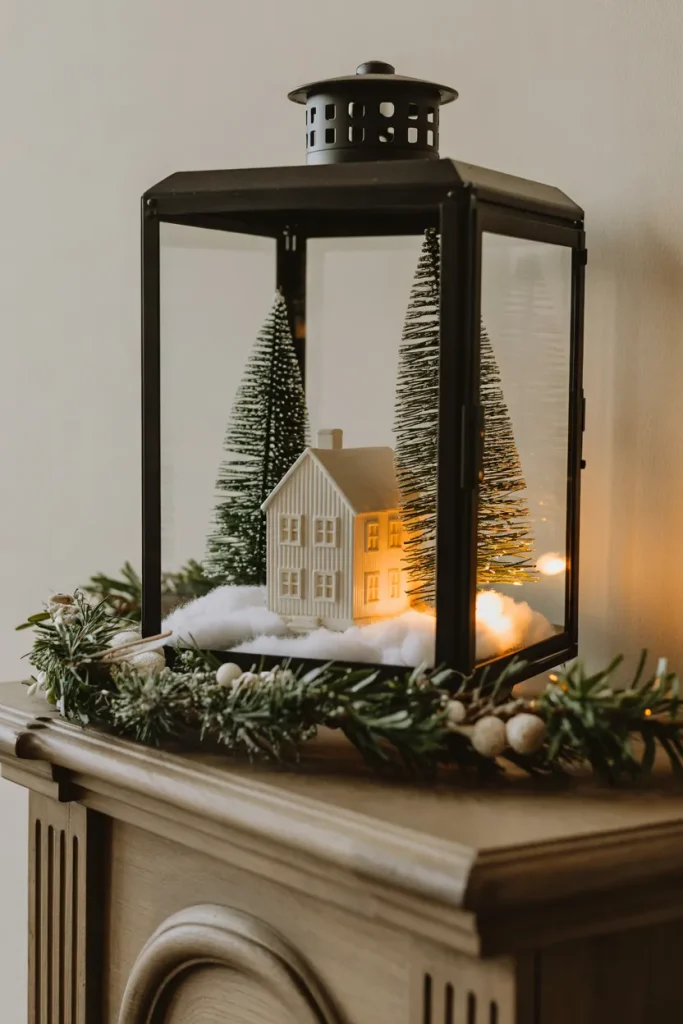
Cost: Low to moderate, depending on the lantern and miniature decorations.
Time: Approximately 20 to 40 minutes.
Skill Level: Beginner, with no special crafting tools required.
Best For: Entryway tables, small apartments, fireplace hearths, and cozy holiday corners.
A lantern keeps a tiny village contained, which makes it easy to move when you need the surface for something else. Measure the lantern opening before shopping for houses, not just its interior height. A removable felt base also makes cleanup simple once the holiday season ends.
Vintage Train Village

A little train winding past snowy houses gives a Christmas village a sense of movement. Choose a compact track that fits your surface, then lay out the loop before placing buildings. Position the station near a straight stretch of track so the train seems to have somewhere to stop.
Keep cottages, trees, and loose snow outside the train’s clearance area, especially around curves. A low wooden board makes the entire scene easier to shift without disturbing the track. For homes with young children, choose age-appropriate train sets and keep small detachable decorations safely out of reach.
Rustic Crate Village
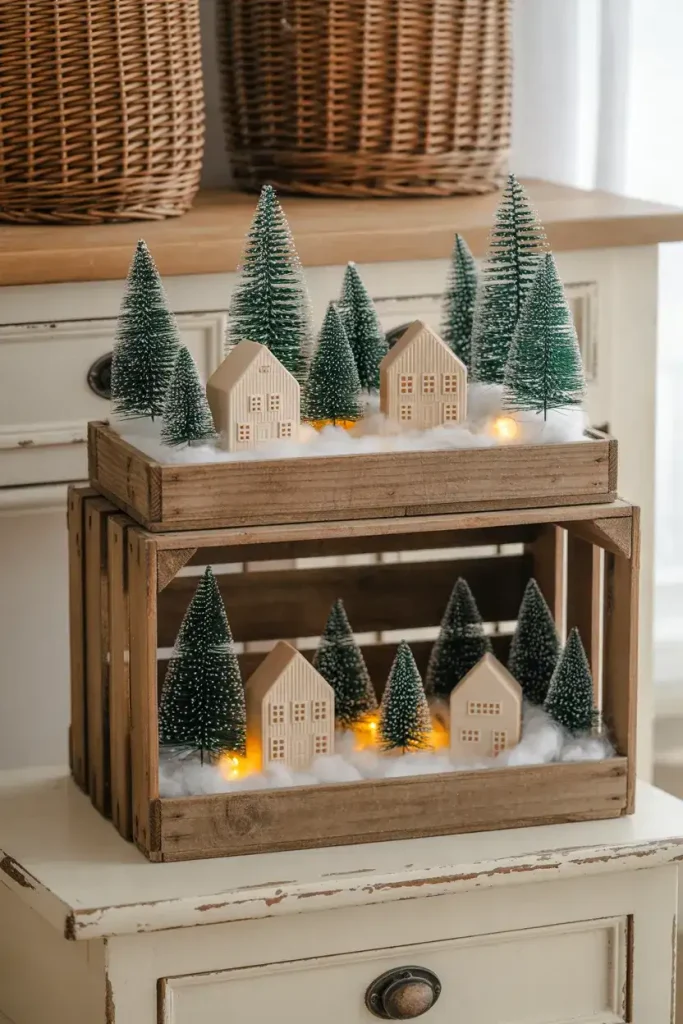
- Weathered wooden crates turn a small collection of Christmas houses into a layered display with instant character.
- Choose two sturdy crates of different sizes and place the larger one flat against a wall.
- Line each crate with cream felt to create a tidy snowy base without loose glitter.
- Set the tallest cottage in the lower crate, then fill gaps with miniature pines.
- Add battery-powered micro lights behind the cottages, keeping wires tucked along the back edges.
Stacking crates creates height without needing expensive display risers. Check that both crates sit securely, and avoid heavy ceramic pieces on an unsupported upper level. A few open spaces around the houses will make each tiny doorway easier to notice. This arrangement works especially well on wide buffets.
Mirrored Village Display
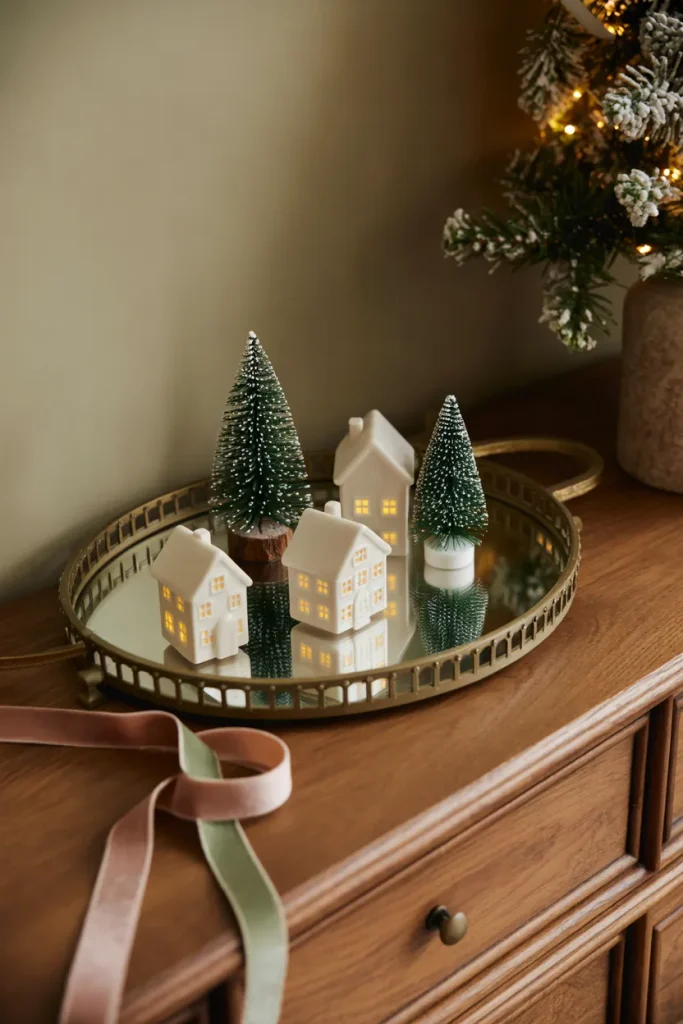
Quick Tip:
A mirrored tray doubles the glow of miniature house windows without adding more lights. Use a tray with a stable frame, and place felt pads beneath ceramic houses to prevent scratches.
Reflections make a small collection of cottages feel fuller, especially on a dim entryway console. Keep faux snow in little patches rather than covering the entire mirror, so the reflective surface stays visible. Arrange the tallest house toward the back and wipe fingerprints from the tray before guests arrive.
Kitchen Hutch Village
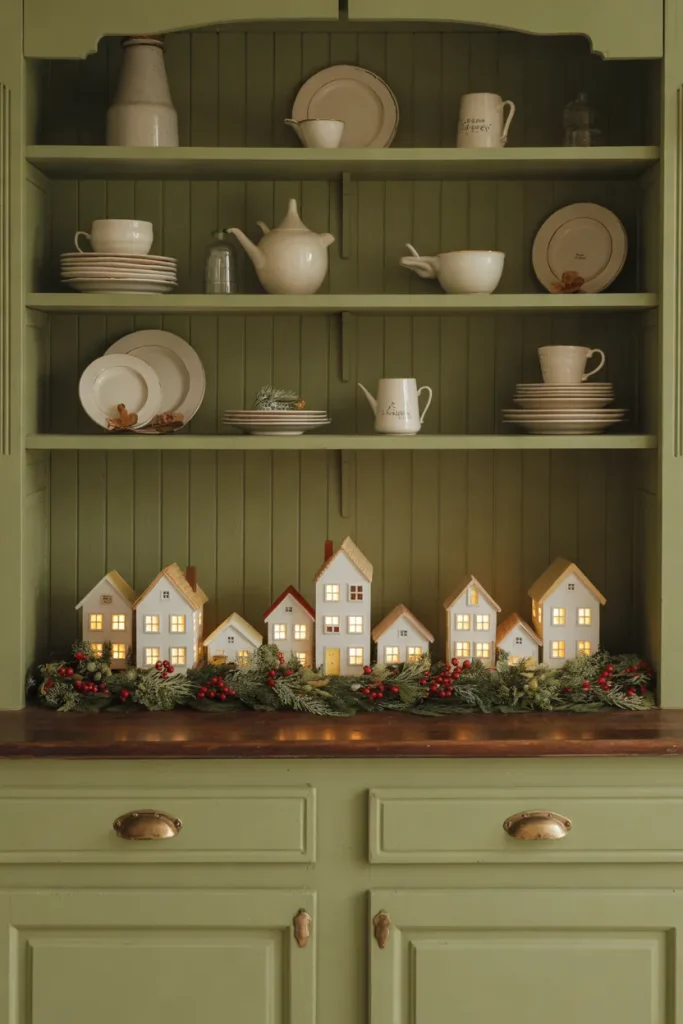
BEFORE:
A crowded kitchen hutch can bury holiday decorations between stacks of mugs and serving bowls. Scattered miniature houses look disconnected when each sits on a different shelf.
AFTER:
Clear one middle shelf and arrange a tidy village of four small cottages. Place two mini evergreens between the buildings, then frame the scene with a light cedar garland that stays away from food and dishes.
The middle shelf naturally draws attention without interfering with the hutch’s everyday storage. Keep the houses a few inches back from the edge, especially if cabinet doors swing nearby. Repeat the hutch’s existing colors in the ornaments so the village feels like part of the room.
Floating Shelf Village
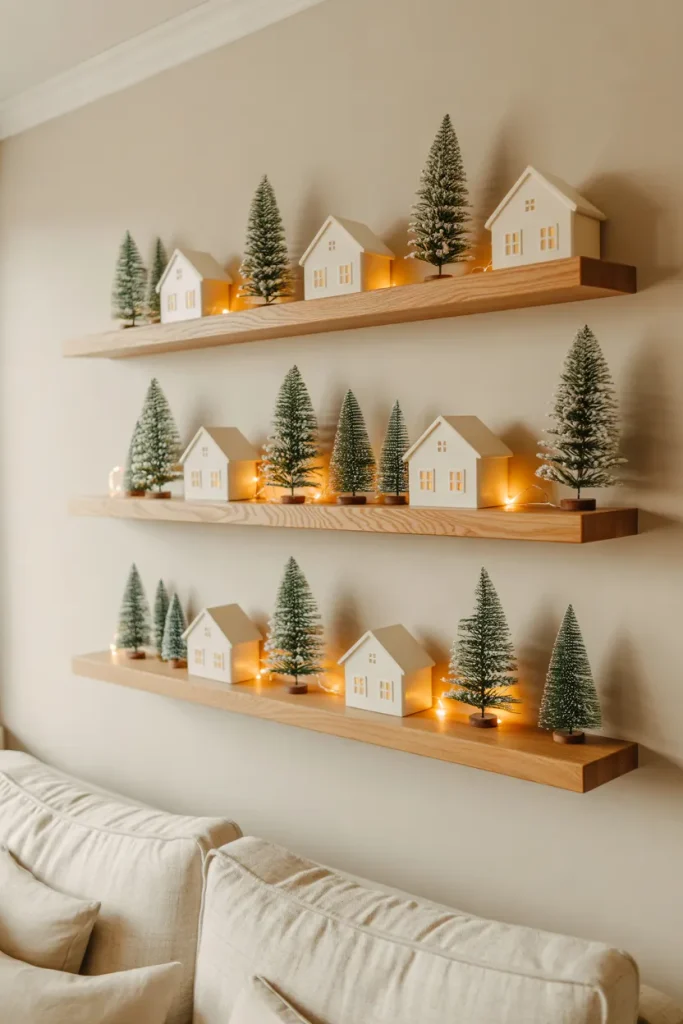
- A blank wall can become a charming Christmas street without taking up floor space. Choose a sturdy floating shelf deep enough for your largest cottage.
- Mount the shelf with suitable wall anchors according to the manufacturer’s instructions. Check that it sits level before decorating.
- Arrange three miniature houses at slightly different distances from the wall, leaving space for small bottlebrush trees.
- Place battery-powered fairy lights along the back edge, hiding the battery pack behind the tallest cottage.
Floating shelves work best when the decorations stay simple enough to appreciate from across the room. Match the cottage colors to nearby furniture, and leave a narrow strip of wood visible along the front. Avoid heavy ornaments and keep everything within the shelf’s recommended weight limit.
Coffee Table Snow Village
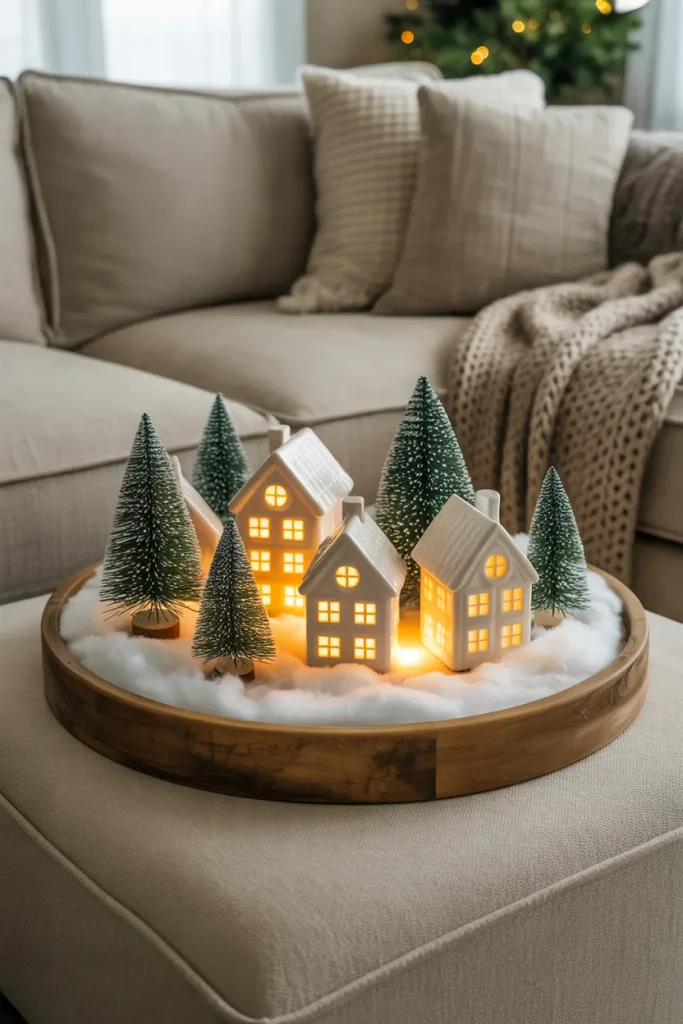
| Detail | Open Arrangement | Tray Arrangement |
|---|---|---|
| Setup | A tiny Christmas street stretches across the tabletop. | A decorative tray gathers the cottages into one scene. |
| Cleaning | Move individual houses to wipe the surface. | Lift the entire tray for easier cleaning. |
| Best For | Large coffee tables with minimal daily use. | Busy living rooms with limited tabletop space. |
| Finishing Touch | Add a narrow white felt runner beneath the houses. | Arrange miniature trees inside the tray edges. |
A coffee table village becomes a charming conversation piece when the arrangement leaves room for everyday essentials. Choose a tray if you regularly use the table for drinks or books. Keep the tallest cottage toward the center, and avoid placing fragile decorations near the outer edges.
Explore More: 20 Christmas Living Room Decor Ideas for a Festive Glow
Woodland Log Village
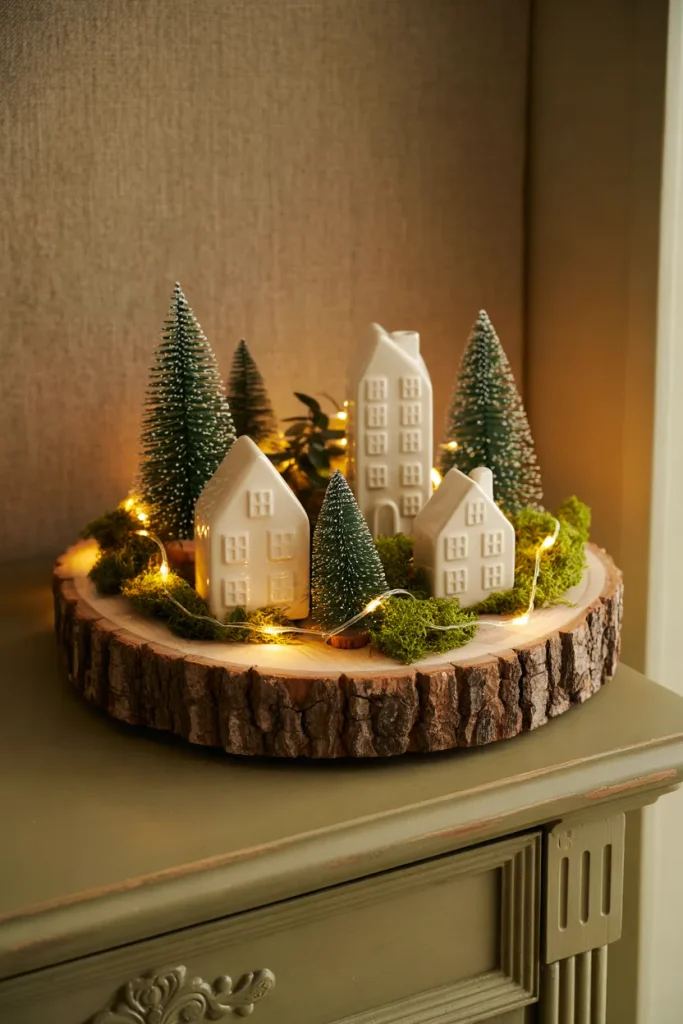
DO:
- Create a woodland scene by arranging three miniature cottages on a wide, level wood slice.
- Choose clean, kiln-dried craft wood with a smooth base that sits securely.
- Cluster bottlebrush trees and artificial moss around the cottages for natural texture.
- Place warm battery-powered LED lights behind the houses to highlight their tiny windows.
DON’T:
- Stack unstable logs that might roll or shift beneath the miniature buildings.
- Use damp moss or freshly cut wood that could damage your decorations.
- Place artificial greenery near open flames or hot light bulbs.
- Cover every inch of the wood because its natural grain adds character.
Natural wood brings a rustic contrast to smooth ceramic cottages. Choose one broad wood slice instead of several stacked pieces, especially on narrow furniture. Leaving some exposed grain makes the village feel thoughtfully arranged, while green trees provide height. Display the finished scene away from direct heat.
Vintage Suitcase Village
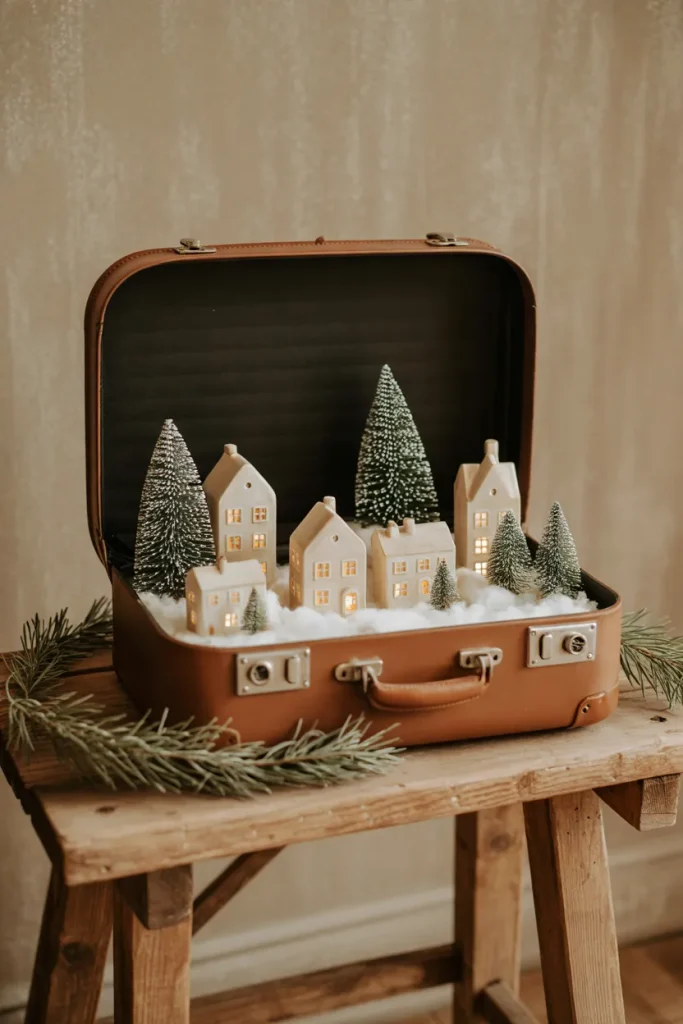
Cost: Budget-friendly, especially with a suitcase you already own.
Time: Approximately 20 to 30 minutes.
Skill Level: Beginner, with simple arranging and decorating.
Best For: Entryway benches, bedroom corners, and vintage-inspired holiday interiors.
An old suitcase makes a charming foundation for a tiny winter village while adding nostalgic character. Line the interior with white felt, arrange three miniature cottages toward the back, and fill the corners with snowy pine trees. Keep the lid securely supported so the display remains stable throughout December.
Sideboard Winter Village
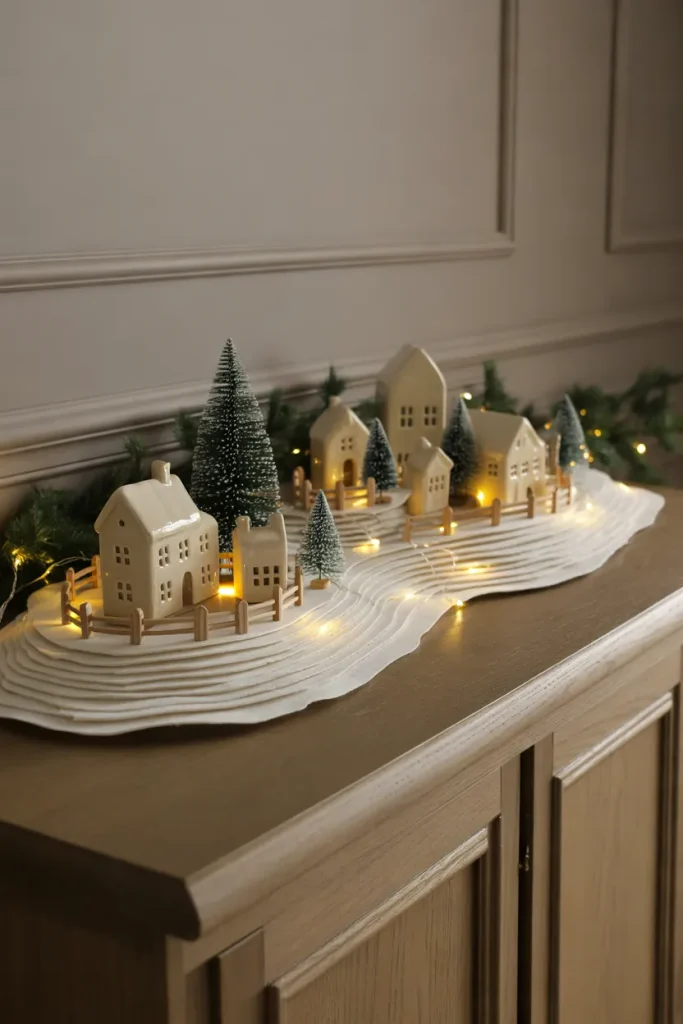
A spacious sideboard gives you enough room to build a miniature Christmas neighborhood with winding streets and snowy hills. Start by placing larger cottages toward the back and smaller houses near the front. Use folded white felt over low, stable risers to create gentle elevation without complicated construction.
Connect the houses with a narrow pathway made from light brown craft paper, then add bottlebrush trees and tiny wooden fences along the edges. Hide warm LED lights behind buildings for a welcoming evening glow. Leave enough open space around the arrangement so the village feels organized rather than overcrowded.
Holiday Bar Cart Village
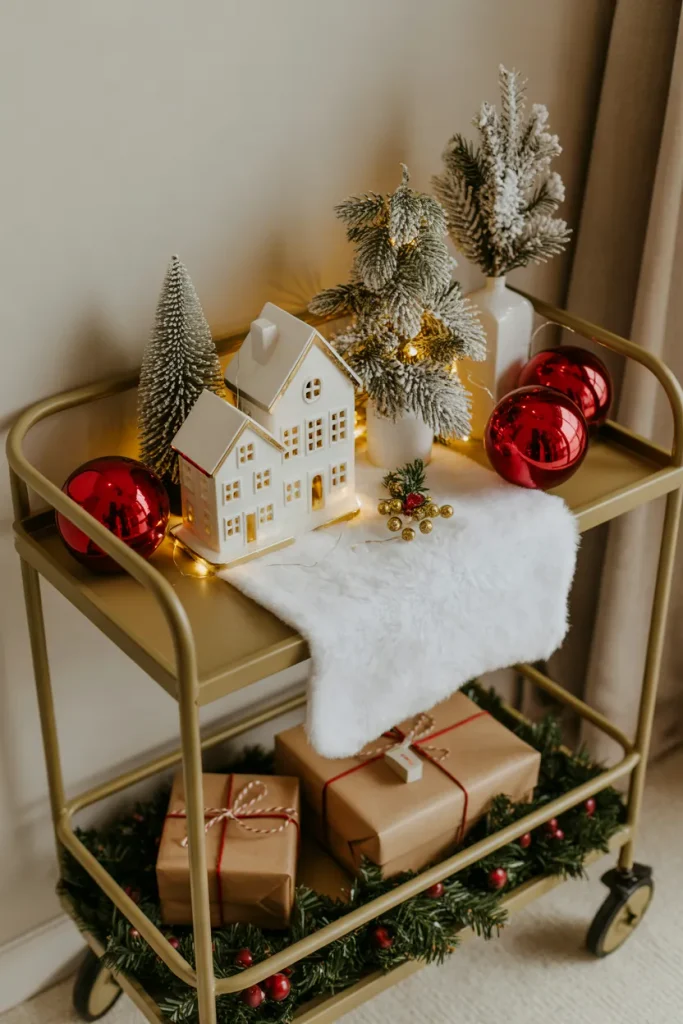
- A rolling bar cart can become a delightful two-level Christmas village without requiring additional furniture. Choose a cart with sturdy shelves and lockable wheels.
- Arrange three illuminated ceramic cottages across the upper shelf, keeping the tallest house near the back.
- Spread a fitted white felt runner beneath the cottages to create a clean snowy foundation.
- Decorate the lower shelf with miniature wrapped presents, small evergreen trees, and a few cranberry ornaments.
- Add battery-powered LED lights around the houses, keeping the wires away from the wheels and moving parts.
The metallic cart frame adds a subtle festive shine, especially when the miniature windows glow after sunset. Keep heavier cottages on the lower shelf if the cart feels top-heavy. Park it against a wall, lock the wheels, and leave enough space for people to walk comfortably.
Cake Stand Village
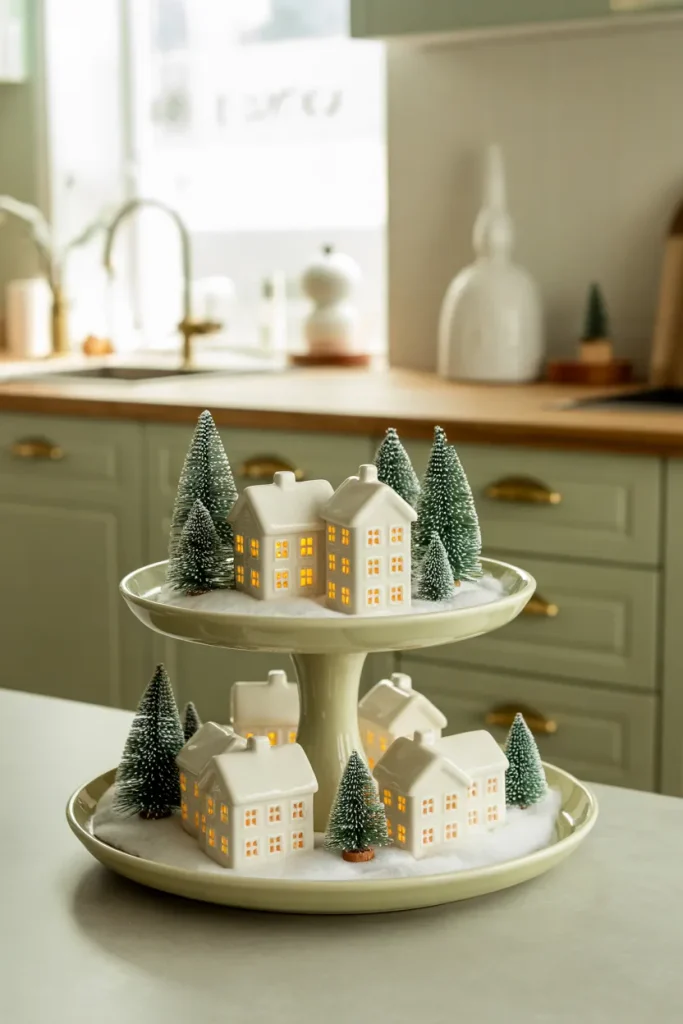
- A cake stand gives tiny houses a place to shine without spreading decorations across the kitchen. Choose a sturdy, wide stand with a flat top.
- Line the stand with a circle of white felt cut slightly smaller than the plate.
- Position one medium cottage near the back and two smaller houses toward the front, leaving a clear rim.
- Tuck miniature pines into the open gaps, then use battery-powered LED lights to brighten the houses from behind.
- Place the finished stand away from food preparation areas and anywhere elbows could accidentally knock it.
The raised plate makes a miniature snowy scene easy to notice even on a busy counter. Keep the whole arrangement lightweight, and avoid loose glitter that could reach food. If your stand has a second tier, reserve it for one small tree rather than crowding it with houses.
Shadow Box Village
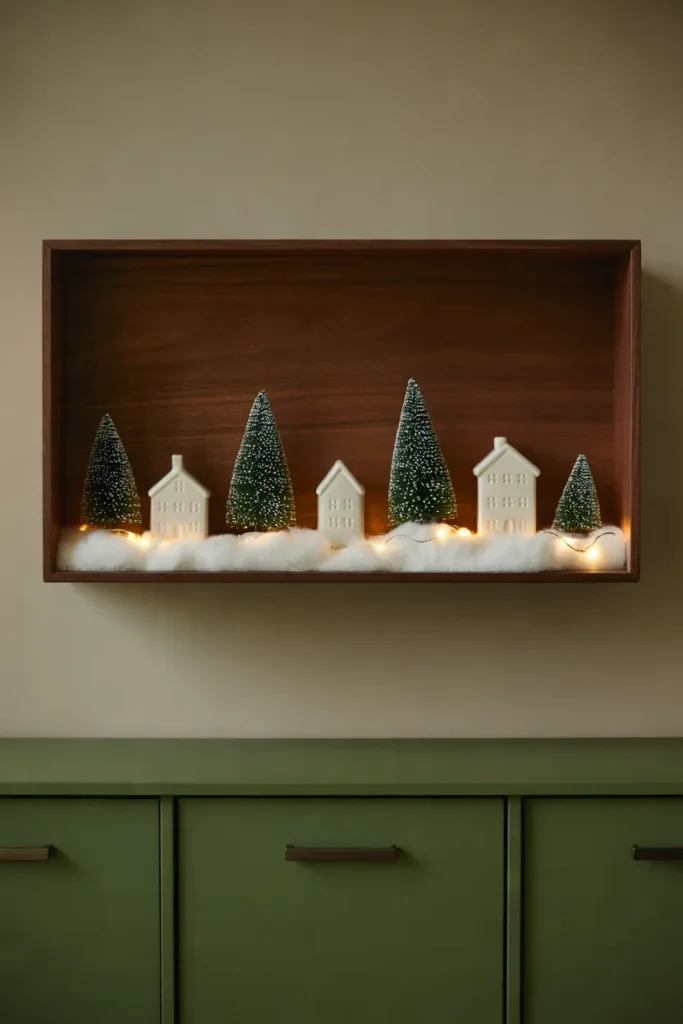
| Detail | Open-Front Shadow Box | Glass-Front Shadow Box |
|---|---|---|
| Appearance | Cozy, accessible miniature scene | Polished, enclosed winter village |
| Cleaning | Requires regular dusting | Keeps decorations protected from dust |
| Lighting | LED lights glow without glass reflections | Lights need careful positioning to reduce glare |
| Decorating | Houses are easy to rearrange | Decorations must fit behind the glass |
| Best For | Shelves and quiet display corners | Entryway walls and decorative cabinets |
A shadow box turns a handful of houses into a framed winter scene that saves counter space. Build the snowy base from removable felt, then secure trees with museum putty. Choose a box deep enough that no roof touches the front, especially if you want to close a glass panel.
Pastel Candy Village
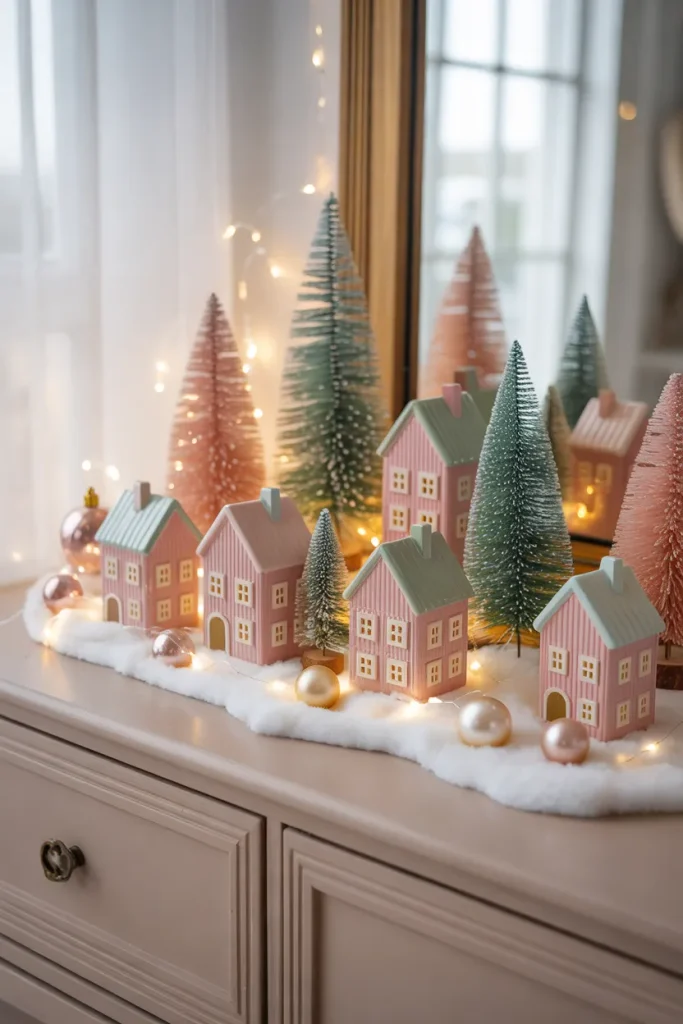
Soft candy colors give a Christmas village a playful look that feels fresh beside traditional red and green decorations. Pick three shades, such as blush pink, mint, and cream, then repeat them across rooftops and trees. Start with white houses and add pastel accessories instead of repainting collectible pieces.
Place the cottages on a pale wooden dresser or entryway console and lay down a thin white felt runner to keep the scene cohesive. Use warm white LEDs instead of multicolored lights, which can muddy the pastels. A few pearly ornaments add sparkle without covering the charming doorways and windows.
Christmas Market Village
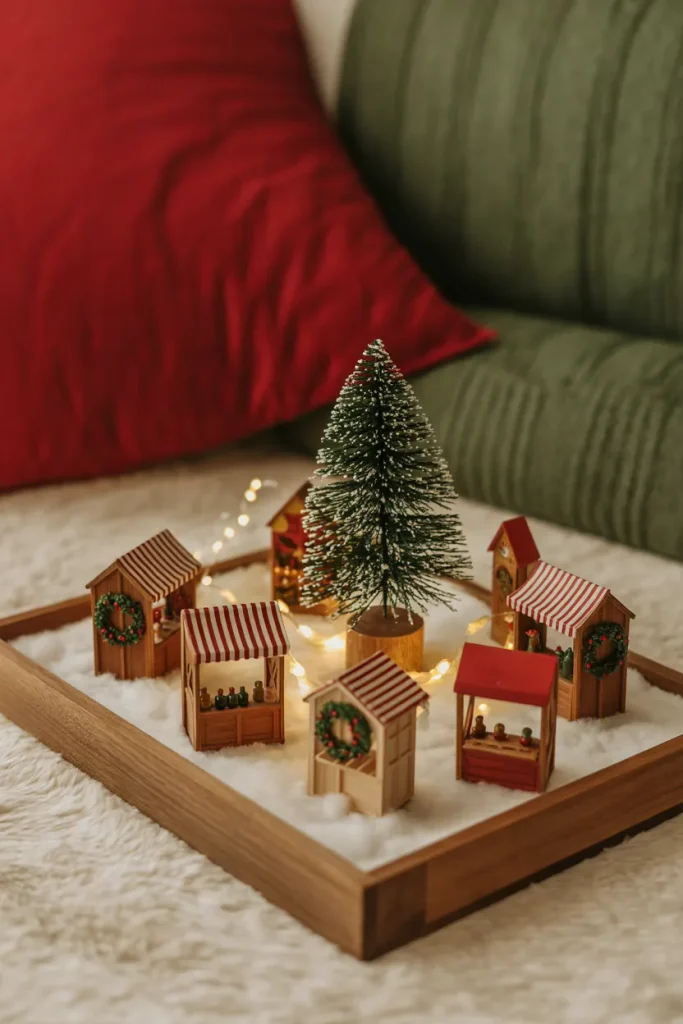
- A festive Christmas market can spring to life on a simple wooden tray. Choose miniature market stalls with different details, such as a bakery, gift shop, and flower stand.
- Position a small Christmas tree in the center to create a natural focal point.
- Arrange tiny stalls around the tree, leaving narrow pathways between buildings for a realistic village layout.
- Decorate the stalls with miniature wreaths, colorful packages, and red striped awnings for cheerful holiday character.
- Add warm battery-powered fairy lights behind the stalls to create the feeling of a bustling evening market.
A market layout feels lively when every little stall has its own purpose. Repeat the same red ribbon on the bakery and gift stands to keep the scene coordinated. Leave a clear walkway between buildings so the details remain visible, and use only battery-powered lights near paper decorations.
Paper Cottage Village
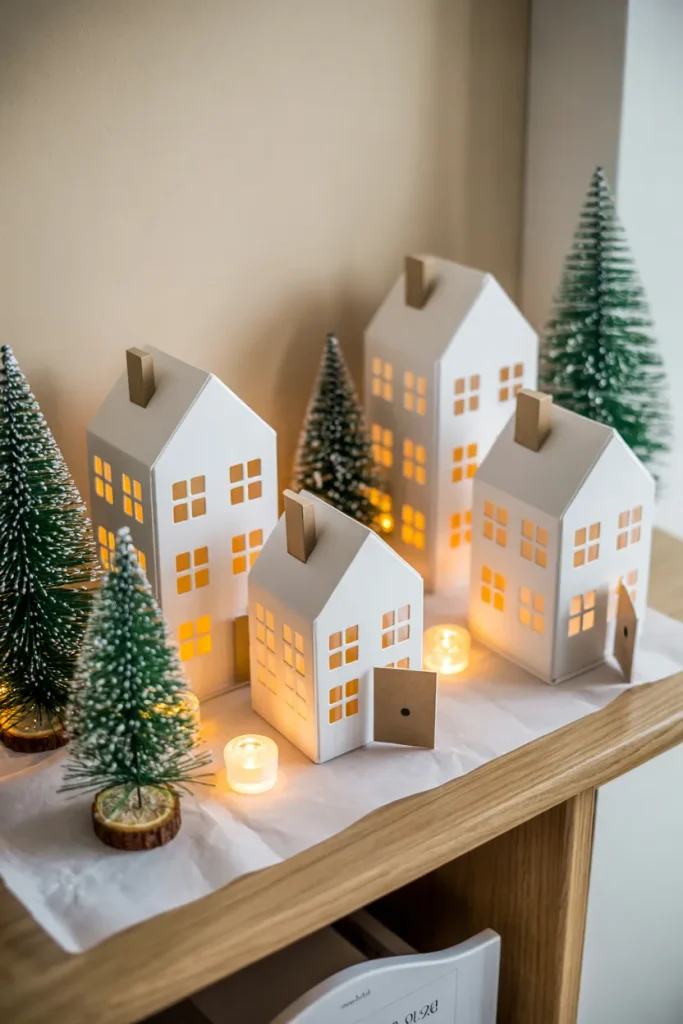
- Handmade paper cottages bring a charming handcrafted touch to holiday decorating without requiring expensive miniature buildings. Choose sturdy white cardstock and simple printable house templates.
- Cut out the house shapes carefully, including small windows and doors. Score the fold lines with a ruler and blunt scoring tool for cleaner edges.
- Fold and glue each cottage into shape, creating a mixture of tall, narrow houses and shorter buildings with pitched roofs.
- Arrange the finished houses on a white felt runner, leaving small spaces for miniature evergreen trees and snowy accents.
- Place cool-running battery-powered LED tea lights inside the cottages to create a gentle glow through the paper windows.
Paper cottages make an affordable holiday village, especially when you need several houses in matching colors. Keep the designs simple with different roof heights instead of intricate trim. Use only cool-running battery LED lights inside, never flames, and store each flattened house in a labeled envelope after Christmas.
Outdoor Porch Village
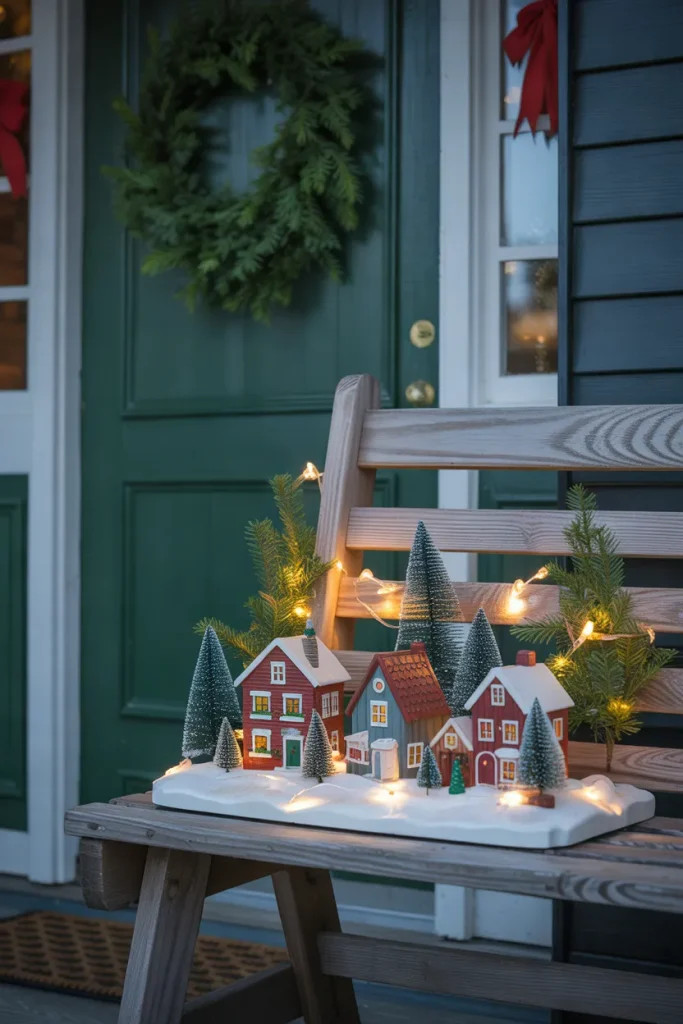
| Detail | Covered Porch Shelf | Enclosed Display Box |
|---|---|---|
| Appearance | An open miniature village with visible snowy trees and cottages | A protected winter scene inside a clear display case |
| Weather Protection | Best for sheltered areas with minimal exposure | Better protection against wind and light rain when properly sealed |
| Decorations | Weather-resistant resin houses, secured trees, and outdoor-rated LEDs | Miniature cottages and fixed decorations protected inside |
| Maintenance | Requires regular checks for moisture and movement | Usually easier to keep clean and organized |
| Best For | Deep covered porches with sturdy shelves | Smaller porches exposed to occasional wind and rain |
A tiny village near the front door makes a festive greeting before anyone steps inside. Choose the setup based on how much wind and rain reaches your porch. Anchor lightweight houses, skip loose artificial snow outdoors, and bring the display inside during severe weather, even if the pieces are labeled weather resistant.
Frozen Skating Pond Village
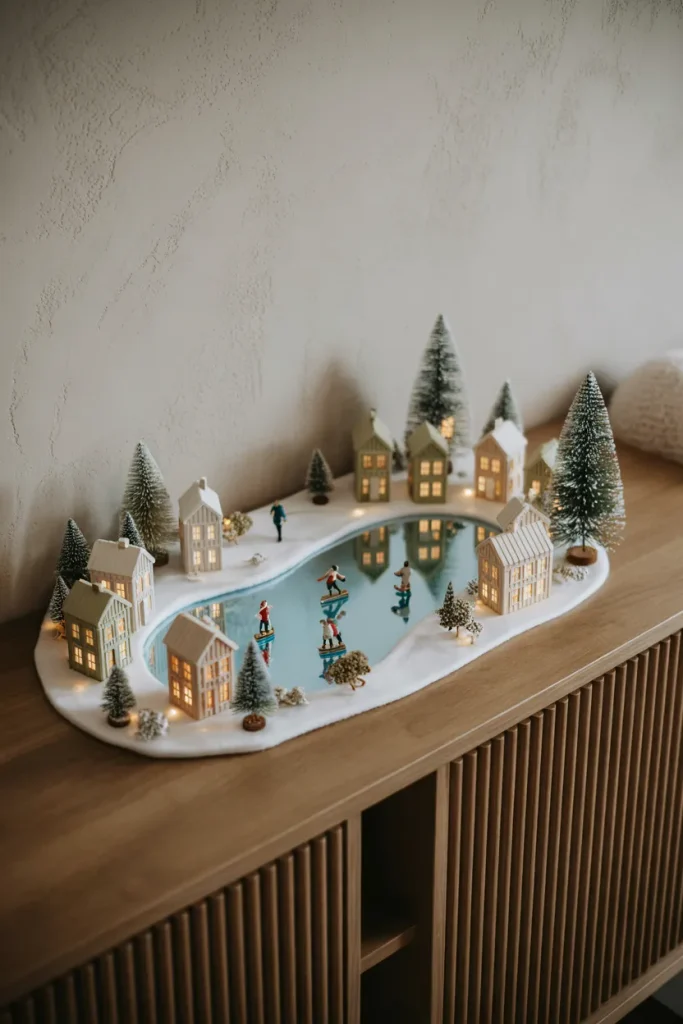
A tiny skating pond gives a miniature Christmas town a focal point beyond rows of cottages. Place an oval piece of pale blue glossy acrylic on a sturdy white felt base. Set two cottages behind it, then cluster snowy bottlebrush trees around the shoreline for a cozy village setting.
Keep the icy surface clear of loose faux snow so it catches the light. For christmas village display ideas with playful detail, place two miniature skaters near the center and a bench to one side. Hide battery-powered LEDs behind the houses rather than beneath the pond.
Conclusion
A memorable Christmas village doesn’t need dozens of houses or a big decorating budget. A few well-placed cottages, softly glowing windows, and tiny trees can make a mantel, shelf, or tabletop feel festive. Choose the christmas village display ideas that suit your space, then start with one simple arrangement and build from there.
Keep pathways visible, lights safely tucked away, and room for each little detail to shine. Save this post on Pinterest for decorating day, and share it with a friend who loves holiday traditions. Your next favorite Christmas corner could begin with just three tiny houses.




6 Comments