22 Enchanting Christmas Apothecary Jar Decorating Ideas
An empty glass jar can become the Christmas detail that makes you pause and smile. These christmas apothecary jar decorating ideas bring tiny snowy villages, velvet ribbon curls, and peppermint stripes to shelves that need a festive touch.
Decorating smaller surfaces can be surprisingly tricky. A hallway console still needs room for keys, and a kitchen counter cannot disappear beneath holiday ornaments. Apothecary jars give your decorations a defined home while letting their colors and textures show through the glass.
The 22 ideas ahead include simple fillers, miniature scenes, and useful displays made with treats or craft supplies. You will find clear placement tips and practical details, including checking jar openings before buying decorations. Start with the jar you already own and choose a look that suits your room.
Miniature Snowy Village
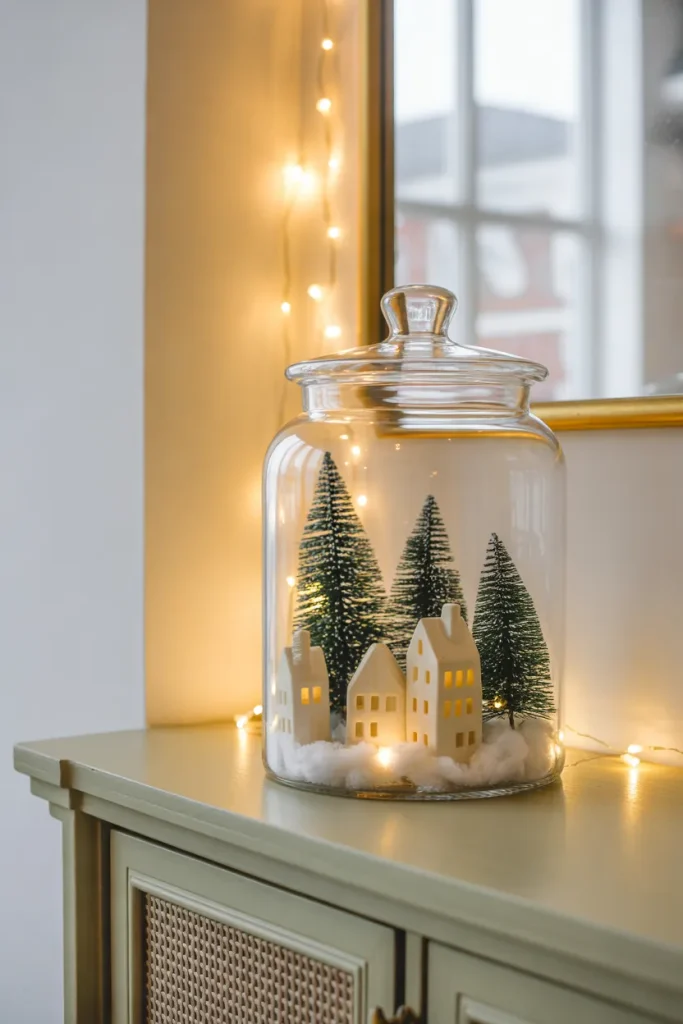
A tiny winter village makes an empty glass jar feel like a Christmas keepsake. Start with a shallow layer of artificial snow, then position one miniature house slightly off center. Place two bottlebrush trees behind it, keeping their tips below the lid so the scene has breathing room.
Among christmas apothecary jar decorating ideas, this arrangement suits a narrow entryway table because the scene builds upward. Choose lightweight pieces that fit through the opening, and use a spoon to spread snow around their bases. Before buying miniatures, measure the jar opening, not just its widest point.
Also View: 25 Christmas Village Display Ideas for a Magical Holiday Setup
Vintage Ornament Layers
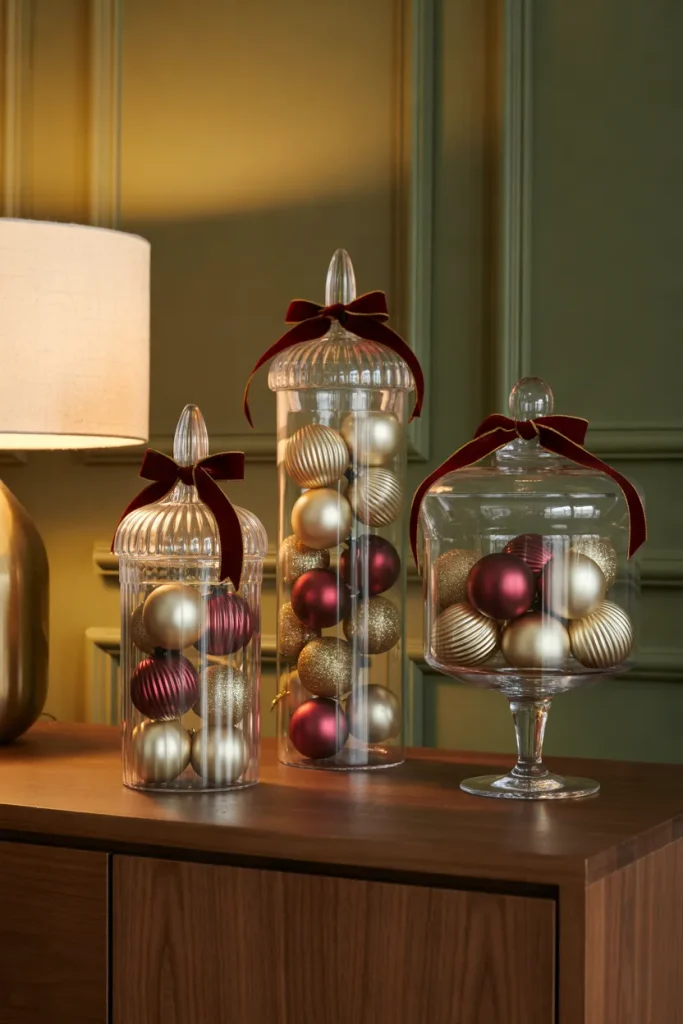
- Give mismatched ornaments a shared color story by choosing three repeating shades, such as burgundy, champagne, and gold.
- Place larger baubles at the bottom, then tuck smaller ones into the gaps. Avoid pressing ornaments against the glass.
- Mix matte, shiny, and ribbed finishes so the display has texture without needing extra colors.
- Tie a narrow velvet ribbon around one jar neck. Leave the others plain to keep the grouping from feeling crowded.
For a balanced arrangement, group three jars with different heights and leave a little empty space beneath each lid. Shatterproof ornaments are easier to reposition and less worrying on a busy sideboard. Reserve fragile heirloom pieces for a stable jar placed well away from the edge of the furniture.
Peppermint Candy Stripes
Quick Tip:
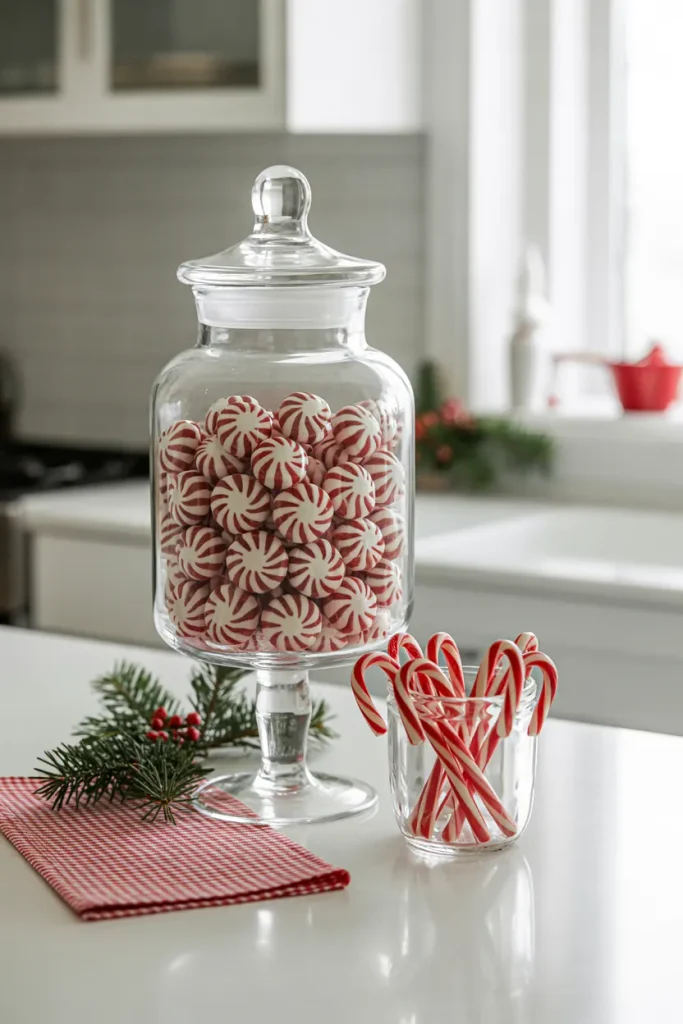
Let peppermint stripes do the decorating. Choose candies with clear individual wrappers so the red and white pattern stays visible, and use a clean, dry jar suitable for food storage if guests will be eating them.
Stand wrapped candy canes around the inside edge of a wide jar, with their hooks facing outward, then fill the center with wrapped peppermints. Keep the lid nearby if the canes extend above the rim. On a cocoa station, a small scoop makes wrapped sweets easier to serve.
Woodland Pinecone Display
BEFORE:
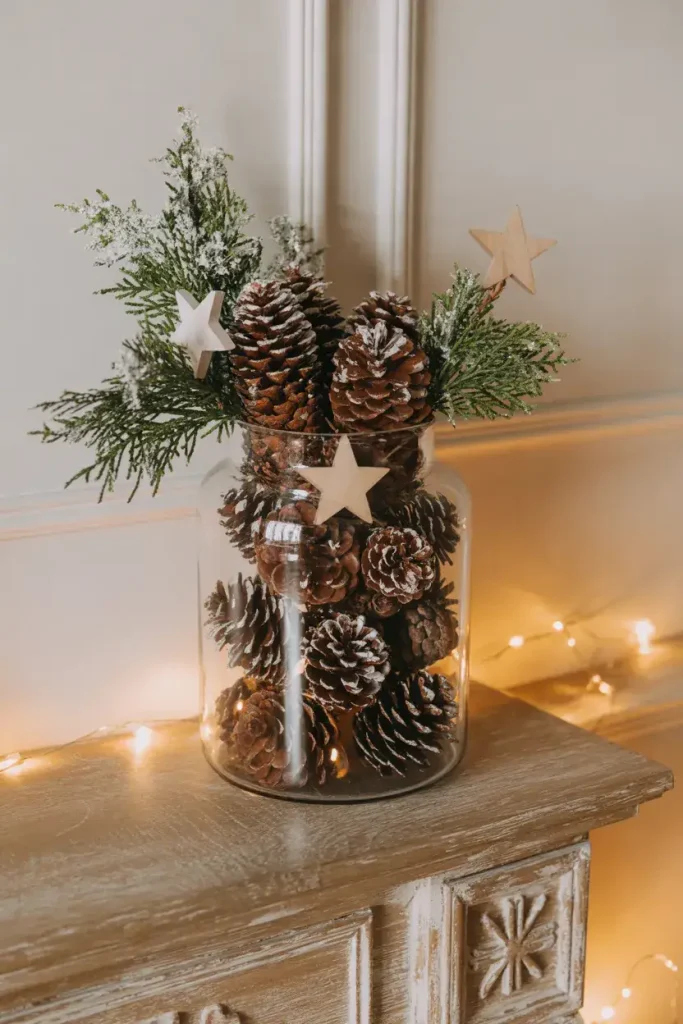
A deep jar can swallow small decorations, leaving the display looking sparse. A handful of pinecones sitting at the bottom may barely register from across the room.
AFTER:
Layer larger pinecones at the base and smaller ones above, turning several outward so their scales show through the glass. Tuck artificial evergreen tips into two or three gaps, leaving enough open space to see individual shapes.
For a snowy finish, lightly brush white craft paint onto a few pinecone tips and let them dry completely before arranging. Keep the remaining cones natural for contrast. Choose clean, dry craft pinecones for a straightforward setup, especially when you need a Christmas mantel display ready in one afternoon.
Golden Fairy Light Jar
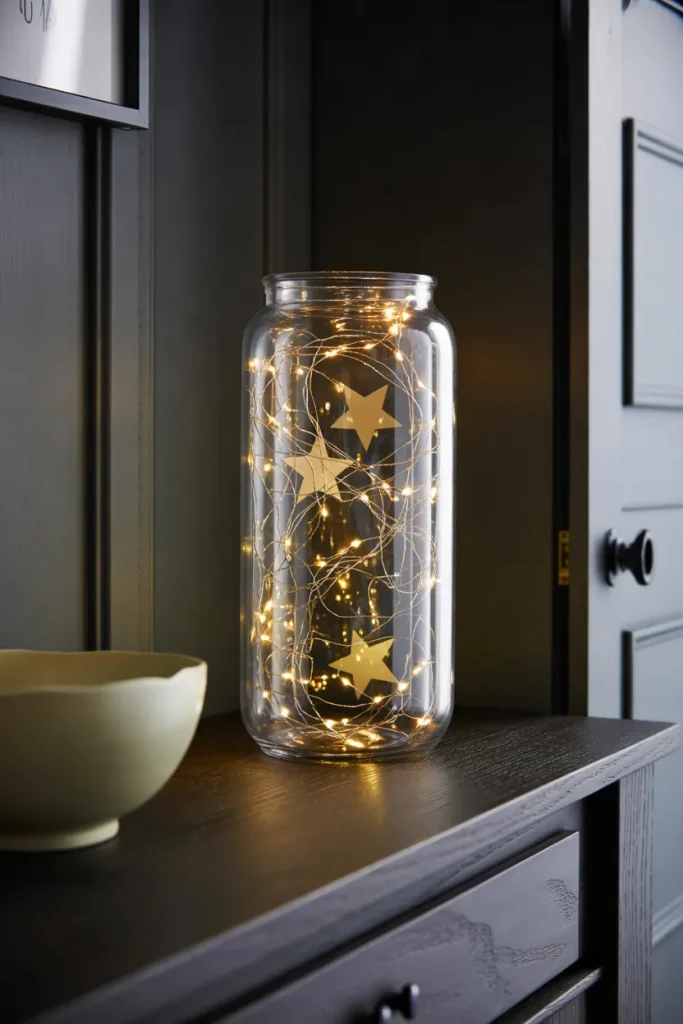
- Turn an empty corner into a warm focal point with a loose coil of battery powered micro fairy lights rated for indoor decorative use.
- Start arranging the wire at the bottom of a clean, dry jar. Spread the lights upward instead of leaving them in a tangled pile.
- Position three lightweight gold stars between the loops, with their faces turned toward the front.
- Keep the battery pack outside the jar, hidden behind its base. Leave the lid off if the wire crosses the rim.
The secret is spacing: a loose arrangement lets individual points of light reflect in the glass. Check the light manufacturer’s placement instructions, and keep the battery pack accessible for switching off. On an entryway table, pair the glowing jar with one unlit decoration so the grouping has a clear focal point.
Also See: 22 Festive Christmas Mason Jar Decoration Ideas to Copy
Dried Orange Layers
| Arrangement detail | Upright slices | Loose horizontal layers |
|---|---|---|
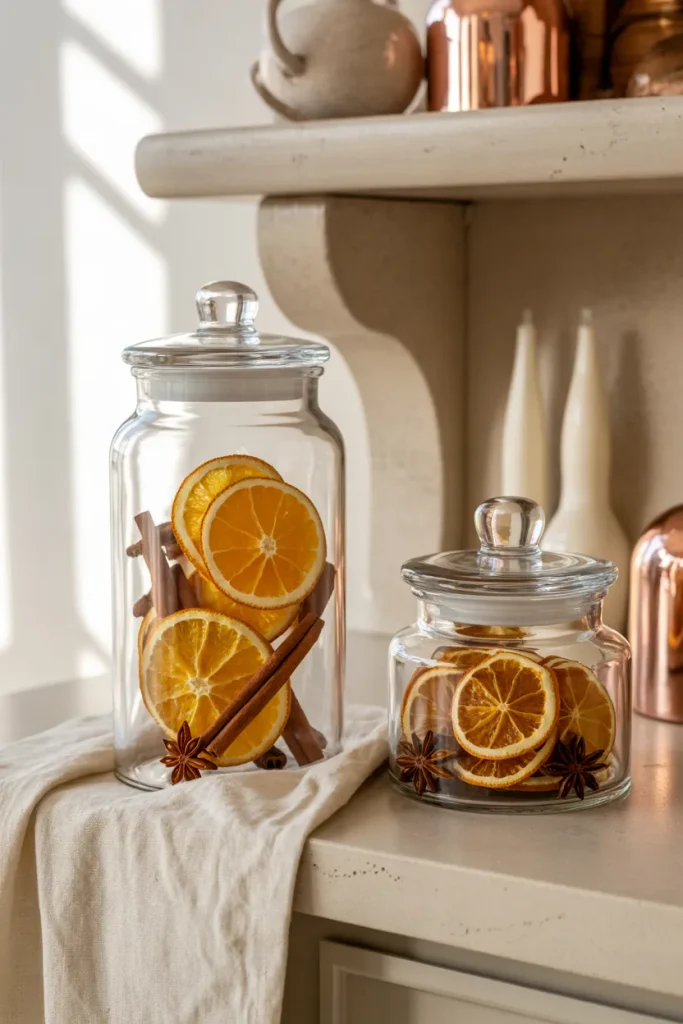
| Visual effect | Shows the round citrus pattern | Shows alternating orange edges and spices |
| Best jar shape | Wide jar with straighter sides | Rounded jar with a generous opening |
| Placement | Face slices toward the glass | Stack loosely with occasional angled slices |
| Finishing touch | Cinnamon sticks in the center | A few star anise pods near the front |
Backlit citrus brings a warm amber color to a neutral Christmas kitchen without needing glitter. Use fully dried slices and dry spices, then arrange them in a clean jar. Keep the display away from steam around the kettle or stove, where moisture could soften the slices and encourage spoilage.
Velvet Ribbon Curls
DO
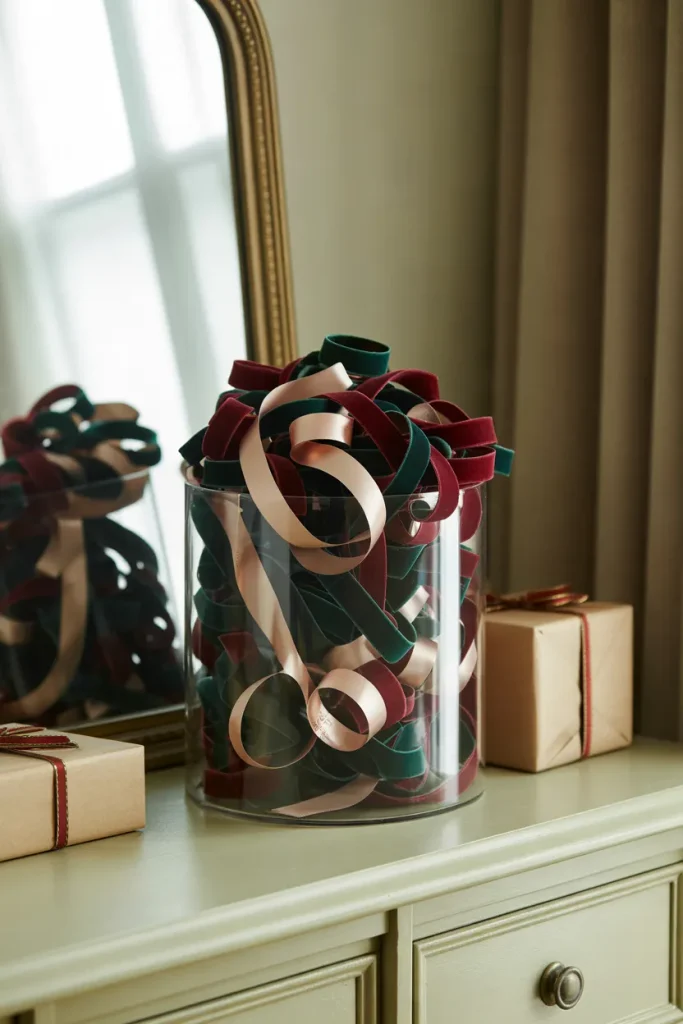
- Let velvet ribbon become the decoration by arranging broad, loose curls against the glass.
- Choose two main colors and one quieter accent.
- Turn the velvet face outward where the ribbon touches the jar.
- Leave space between loops so their shapes remain visible.
DON’T
- Pack ribbon tightly enough to flatten the curls.
- Mix numerous narrow scraps that make the arrangement look tangled.
- Attach adhesive directly to delicate ribbon.
- Fill the neck so completely that the lid catches the fabric.
Start with your longest ribbon, loosely coil it around your fingers, and lower it into the jar. Tuck shorter pieces into visible gaps with a blunt wooden spoon. This Christmas jar filler gives leftover gift wrapping ribbon a purpose, and the pieces remain easy to retrieve for another project.
Tiny Wrapped Presents
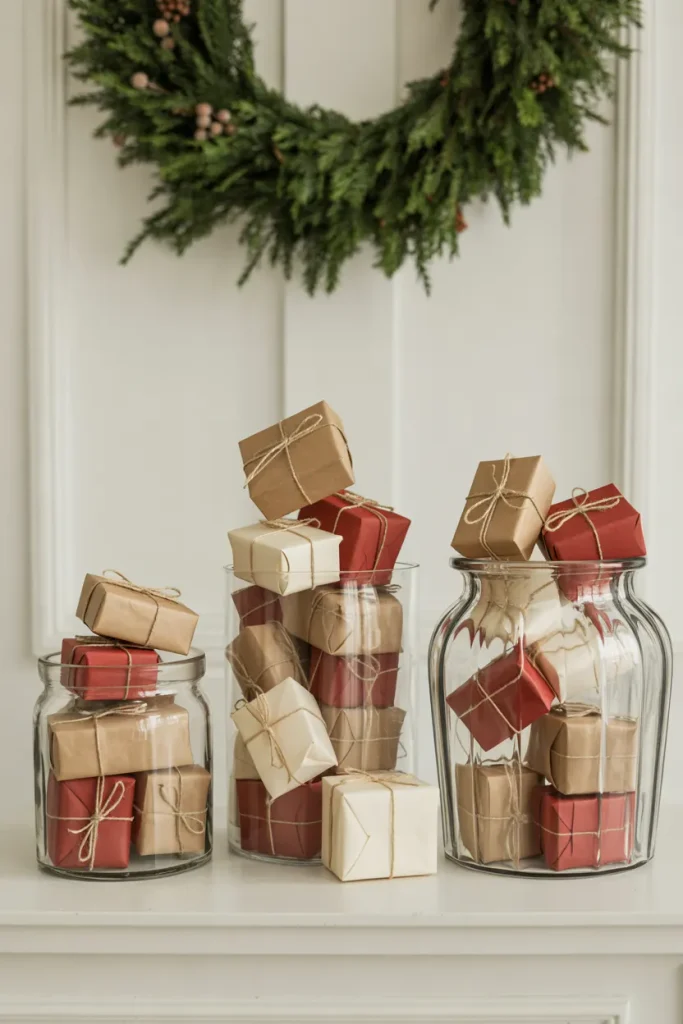
Visual Effect: A stack of tiny presents brings the excitement of Christmas morning onto a shelf.
Materials: Small empty craft boxes, wrapping paper scraps, thin ribbon, and scissors.
Skill Level: Beginner, with simple wrapping and bow tying.
Best For: Wide jars that let you position boxes without crushing their corners.
Wrap each miniature box before placing it inside, and check that the finished bow fits through the opening. Alternate the direction of the packages so several ribbon crossings face outward. A limited paper palette keeps the arrangement readable through curved glass, particularly when the boxes sit at different angles.
Silver Bell Collection
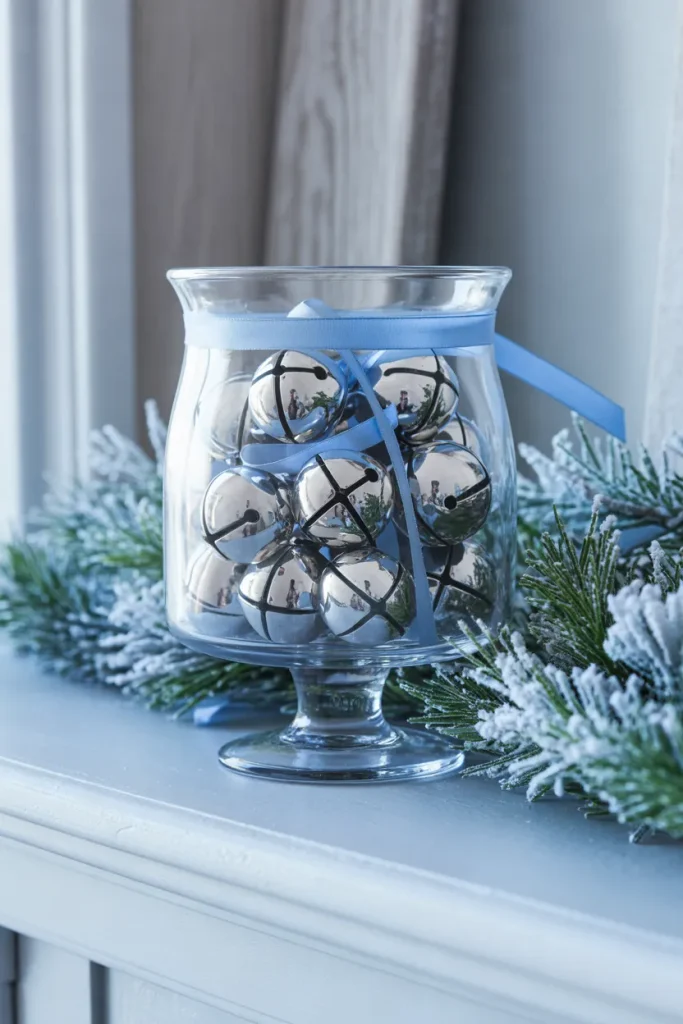
Silver bells catch the light even before anyone touches the jar. Gather three sizes and place the largest at the bottom, then scatter smaller bells between them. Turn a few slotted faces toward the glass so the contents read clearly as bells instead of a solid metallic pile.
For a softer finish, thread pale blue ribbon through two or three bell loops and let the tails curve between the layers. Skip a bow on the lid if the interior already feels busy. Keep these small decorations on a high shelf away from young children and curious pets.
Gingerbread Cookie Cottage
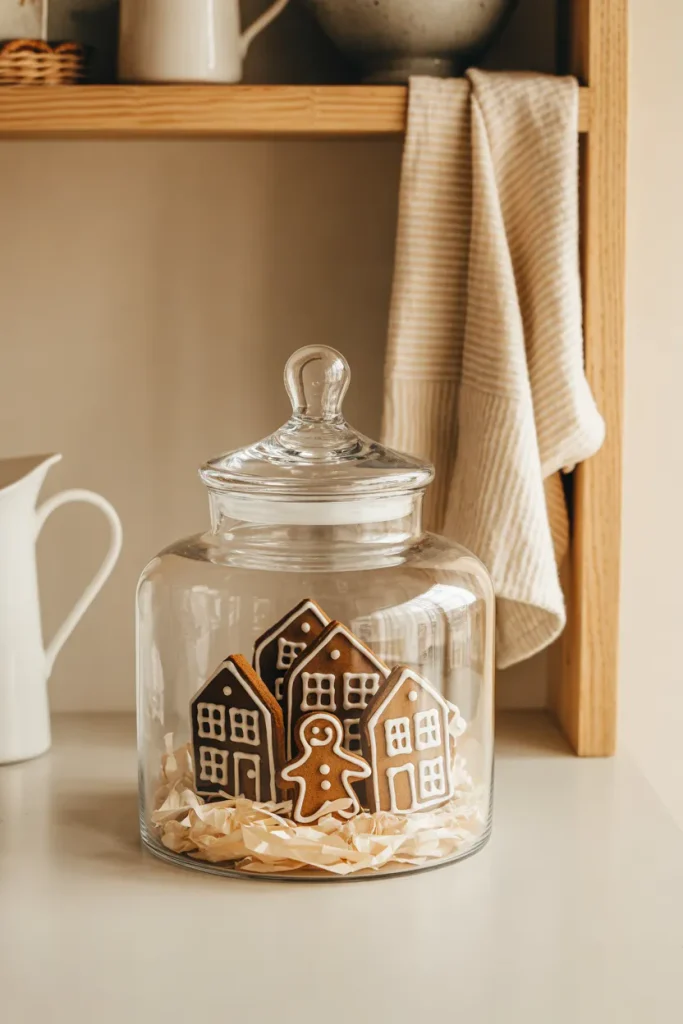
- Bring the gingerbread house look onto a small shelf with miniature faux cookies that need no baking.
- Choose one small cottage as the focal point, then place two gingerbread figures beside it.
- Spread a shallow layer of cream paper shreds beneath the pieces to steady their bases.
- Face the white icing details toward the front, leaving a visible gap around the cottage roof.
- Keep decorative faux cookies separate from edible treats, especially on a kitchen counter.
Check the cottage height with the lid in place before building the arrangement. A house that almost touches the glass top can make the scene feel cramped. Repeat its white icing color in a nearby pitcher or mug, giving the shelf a connection without adding more decorations inside the jar.
Paper Snowflake Flurry
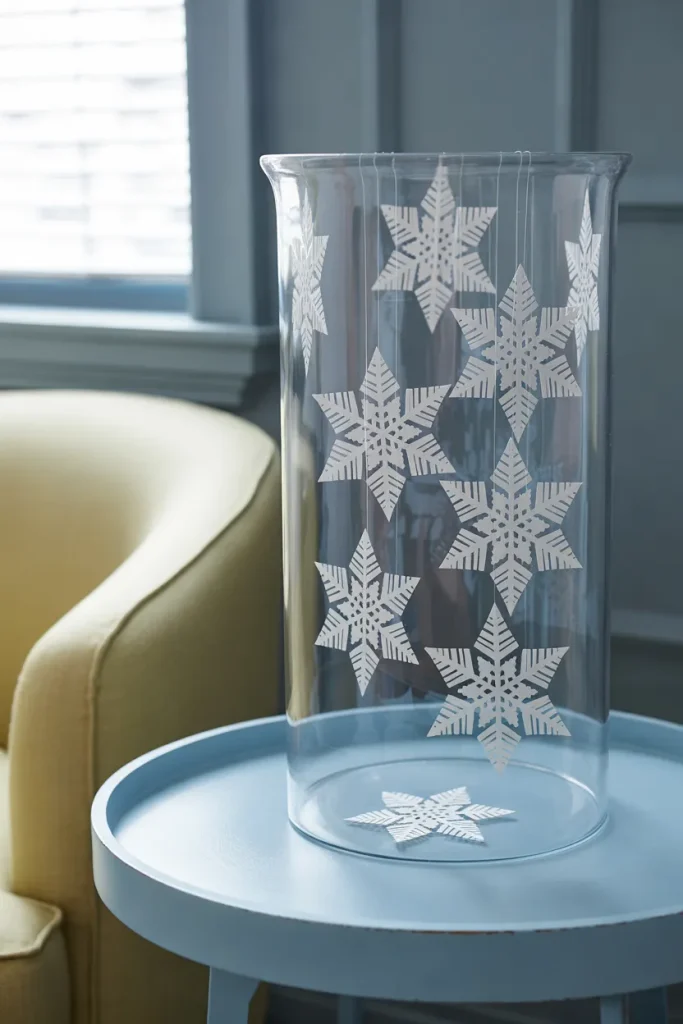
Quick Tip:
A paper snowflake looks more delicate with empty space around it. Use three small cutouts at different heights, and attach their threads beneath the lid with removable tape tested on a hidden spot first.
Cut snowflakes from lightweight white paper, keeping each one narrower than the jar opening so it slides inside without folding. Adjust the threads before replacing the lid, then turn the jar until the shapes overlap only slightly. Against a darker wall, the white cutouts become much easier to see.
Red Berry Branches
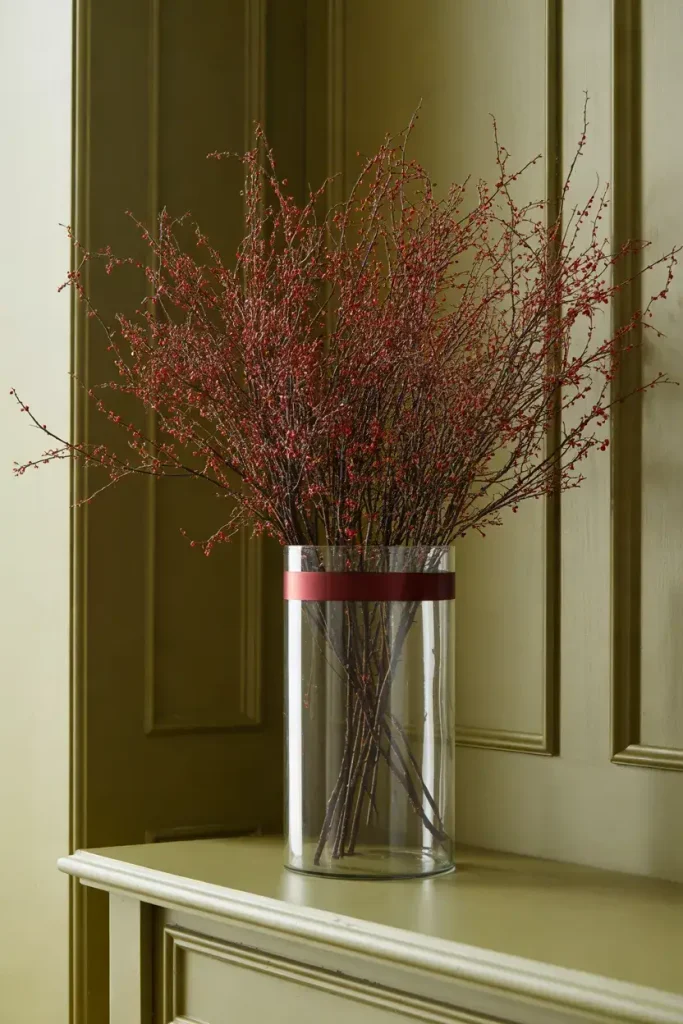
BEFORE:
Bare branches can disappear against a busy entryway wall. Several stems of equal height may also form a flat outline that feels unfinished.
AFTER:
Replace them with artificial red berry branches in three staggered heights, placing the tallest toward the back. Angle two shorter stems outward so the red clusters spread beyond the jar neck without blocking the walkway.
For christmas apothecary jar decorating ideas with height, choose a jar with a broad, stable base and lightweight stems. Set the lid beside it on a tray rather than balancing it against the glass. Keep the tallest branch below a nearby mirror’s main viewing area so the arrangement stays practical.
Christmas Postcard Jar
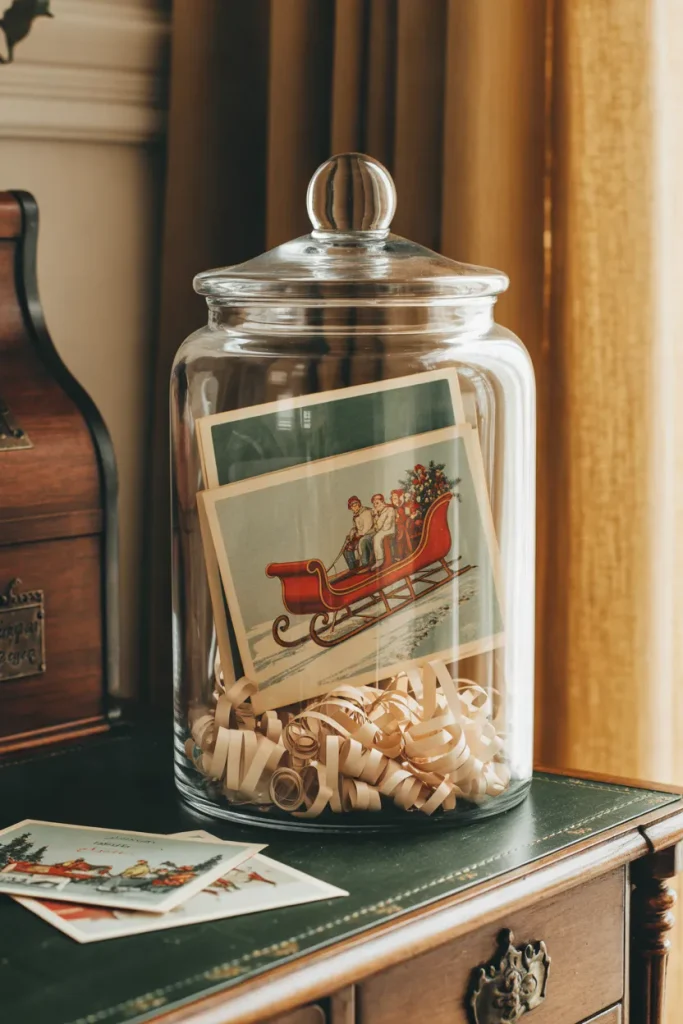
- Give a favorite Christmas card its own display by choosing one with a bold illustration that remains readable through glass.
- Cut a lightweight cardstock backing slightly smaller than the card. Lean both against the inside rear of a wide jar.
- Place two smaller cards at gentle angles behind the main illustration, keeping their decorative corners visible.
- Cover the bottom edge with a few ivory paper curls, then replace the lid without bending the cards.
Use reproductions for valuable vintage cards, since curling paper to fit a narrow opening can leave permanent creases. A broad jar with relatively straight sides gives the clearest view. Position the main illustration above the paper filler so its details remain visible from a seated position across the room.
Knitted Snowball Stack
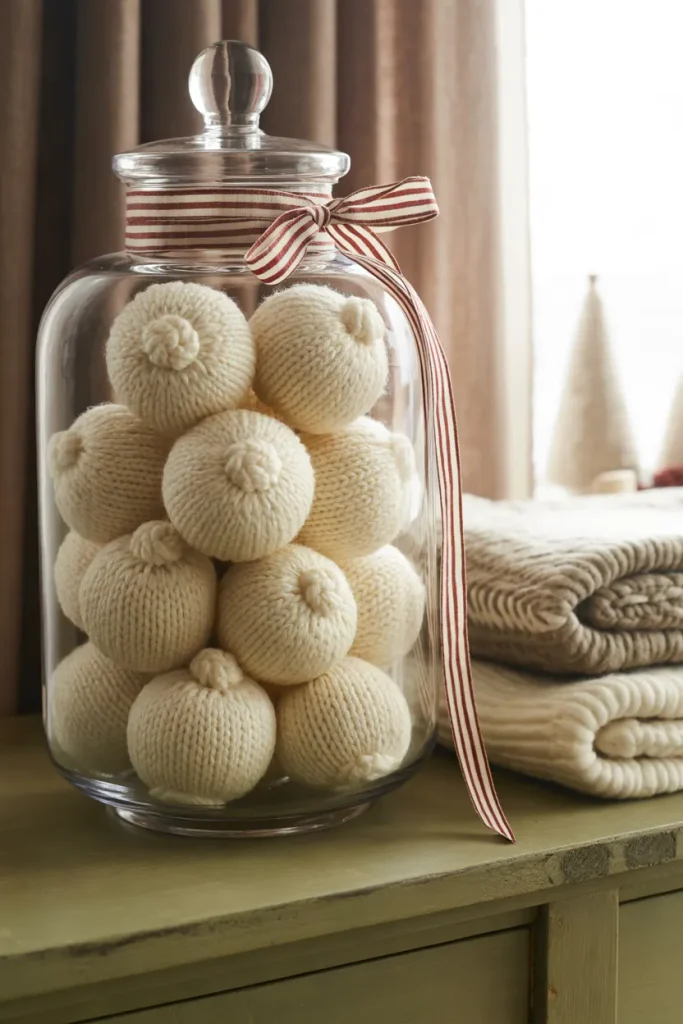
| Styling detail | Loose snowball pile | Structured snowball stack |
|---|---|---|
| Overall look | Relaxed, with balls tilted at different angles | Orderly, with a clear pyramid shape |
| Size selection | Mix small and medium balls | Use larger balls below smaller ones |
| Texture placement | Scatter cable and ribbed finishes throughout | Face distinct knitted patterns toward the front |
| Jar shape | Rounded bowl with a wide opening | Broad base with gently tapering sides |
Soft knitted snowballs bring sweater texture to a display dominated by smooth glass. Choose lightweight decorative balls that hold their shape, then arrange them without squeezing the knit against the sides. Finish with striped ribbon at the neck, leaving the lid plain so the yarn texture stays the focus.
Miniature Nutcracker Guard

DO
- Give one miniature nutcracker center stage by facing its painted features toward the clearest side of the glass.
- Choose a figure that stands comfortably below the closed lid.
- Set its feet on a flat wooden disc that fits through the opening.
- Place two tiny gift boxes beside its boots for a simple festive base.
DON’T
- Force a wide hat or raised arm through a narrow jar neck.
- Balance the figure on loose filler that lets it tilt.
- Surround its face with tall decorations.
- Crowd several detailed figures into a jar that only suits one.
Measure the nutcracker at its widest point, including any drum, sword, or outstretched arms, before choosing a jar. Lower it in feet first while supporting the body. A restrained base makes the painted uniform easier to appreciate, especially on a bookshelf where neighboring objects already provide plenty of detail.
Coastal Christmas Shells

Color Palette: Ivory shells and silver beads give coastal Christmas decorating a wintry sparkle.
Materials: Clean, dry shells, small starfish ornaments, silver bead garland, and blue ribbon.
Skill Level: Beginner, with loose layering rather than precise assembly.
Best For: Beach cottage shelves, pale blue living rooms, and neutral holiday displays.
Place broad shells along the bottom, then angle smaller shells toward the glass so their ridges remain visible. Wind a short silver bead garland between the layers rather than covering everything with it. The metallic thread connects the seaside pieces to Christmas while keeping their natural shapes easy to see.
Festive Thread Spools
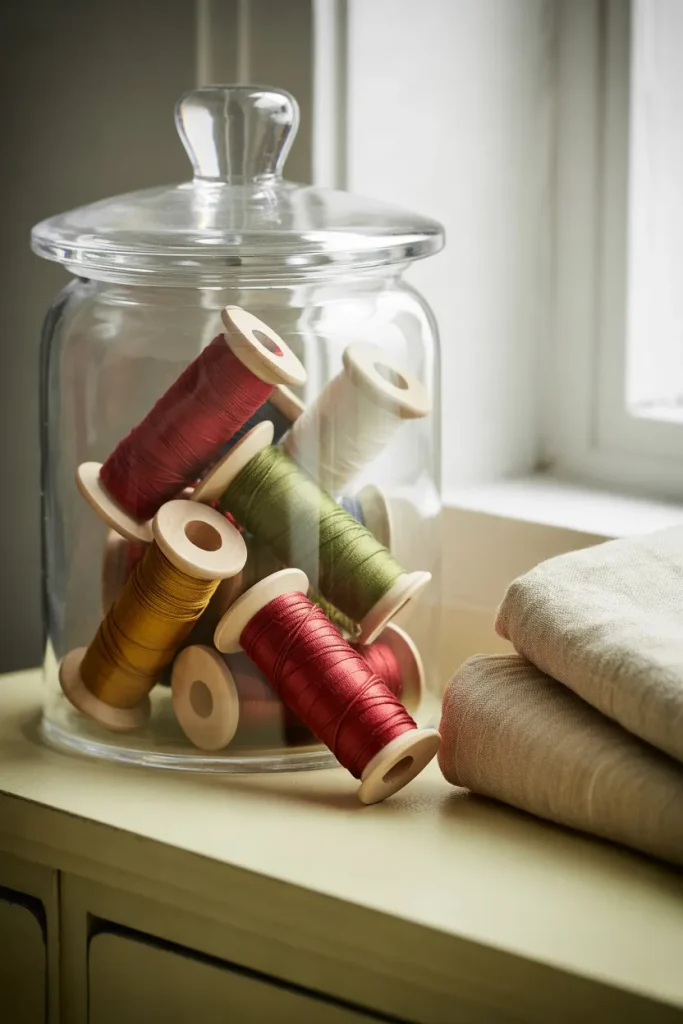
A handful of thread spools can turn a craft room shelf into a quiet Christmas display. Select cranberry, pine green, and ivory thread, then add one gold spool for a little shine. Lay several spools sideways at the bottom and angle the next layer to reveal their wooden ends.
Keep each loose thread end tucked beneath its final wrap so the contents stay tidy through the glass. Use empty wooden spools wrapped with leftover thread if your working supplies need to remain accessible. A narrow gingham bow around the jar neck finishes the arrangement without hiding the colors inside.
Advent Message Scrolls
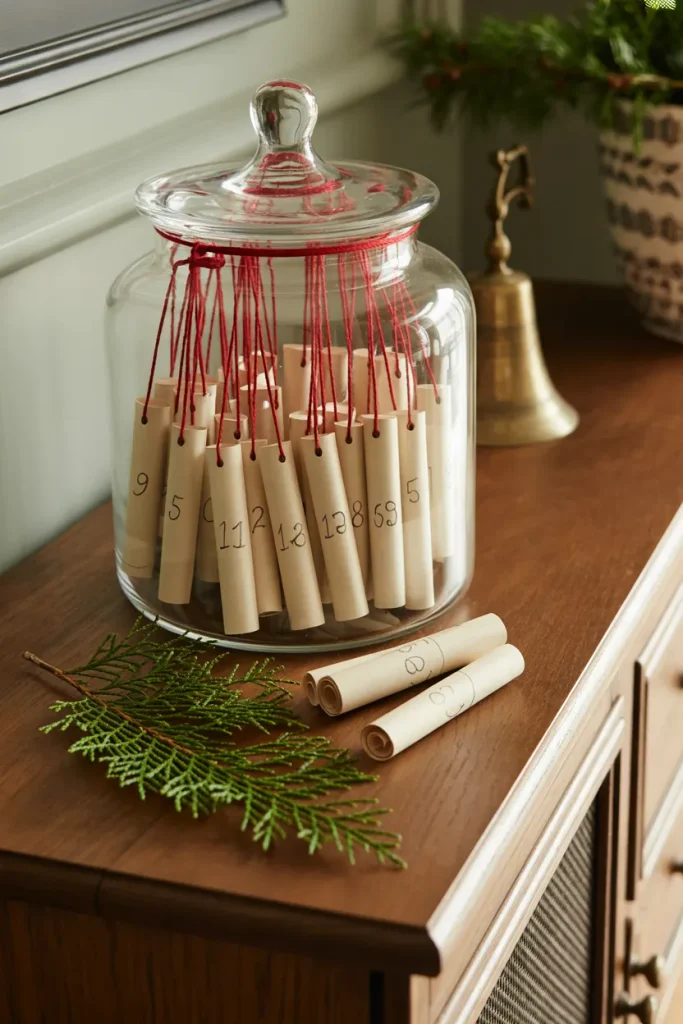
- Let the jar count down to Christmas with 24 paper scrolls, each holding a small activity or thoughtful message.
- Cut equal paper strips and write one suggestion on each, such as choosing a holiday song or calling a relative.
- Roll the strips loosely and tie them with red cotton thread. Number the outside from 1 to 24.
- Place the highest numbers at the bottom and the earliest dates near the top, turning their numbers toward the glass.
- Choose a jar with a generous opening so retrieving one scroll does not require emptying the display.
Keep the activities small enough for an ordinary weekday, with longer plans saved for dates when everyone is available. A shared song or a handwritten thank you can feel just as meaningful as an outing. After opening each scroll, place it in a nearby envelope to preserve the family’s December memories.
Christmas Tree Truck

- Park a little Christmas nostalgia inside the glass with a miniature red truck that fits through the jar opening.
- Tie a small bottlebrush tree into the truck bed with cream cotton string, keeping the branches clear of the wheels.
- Spread a thin layer of artificial snow across the bottom, leaving a level patch for the truck.
- Lower the assembled truck into place and angle its front slightly toward the viewer so both the cab and tree remain visible.
Test the truck and tree together before adding snow, since the combined height matters more than either piece alone. Keep the wheels partly exposed so the vehicle looks parked rather than buried. This arrangement works best in a broad jar with enough room to recognize the truck’s familiar outline.
Tinsel Garland Spirals
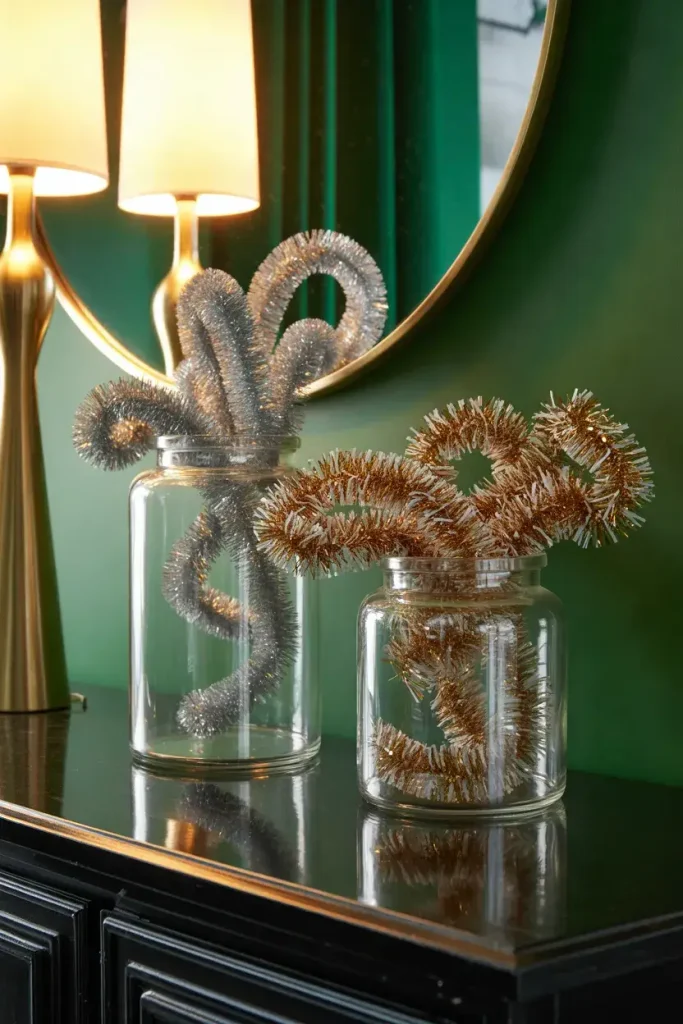
| Styling detail | Fine silver tinsel | Broad champagne tinsel |
|---|---|---|
| Visual effect | Delicate sparkle with visible individual strands | Fuller loops with larger reflective surfaces |
| Suitable jar | Slender jar with room for loose coils | Wide jar that accommodates thicker garland |
| Arrangement | Wind into several airy spirals | Shape into two or three generous loops |
| Finishing detail | Keep the jar neck plain | Add a narrow cream ribbon below the lid |
A single length of tinsel can fill a jar with sparkle without covering every inch of glass. Coil it loosely outside the jar first, then lower it inside and gently separate compressed sections. Stop while the curves remain distinct; tightly packed tinsel reads as a shiny block from across the room.
Felt Poinsettia Blooms
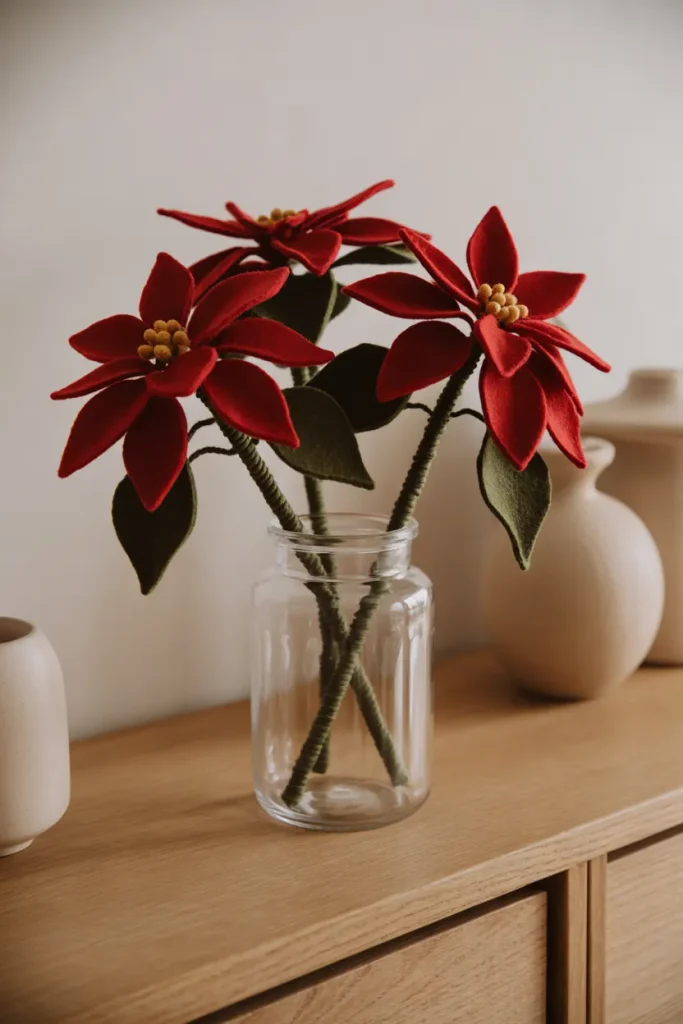
Three felt poinsettias give a glass jar the presence of a flower arrangement with a softer, handmade finish. Choose one large bloom and two smaller ones, then bend their stems so each flower faces a slightly different direction. Keep the tallest bloom just above the others for shape.
Wrap visible stems with dark green floral tape before arranging, and use a short, wide jar to support their spread. Leave the lid on a nearby tray. For a dining room sideboard, angle the largest bloom toward the table so its layered petals remain visible while guests are seated.
Christmas Cookie Stack
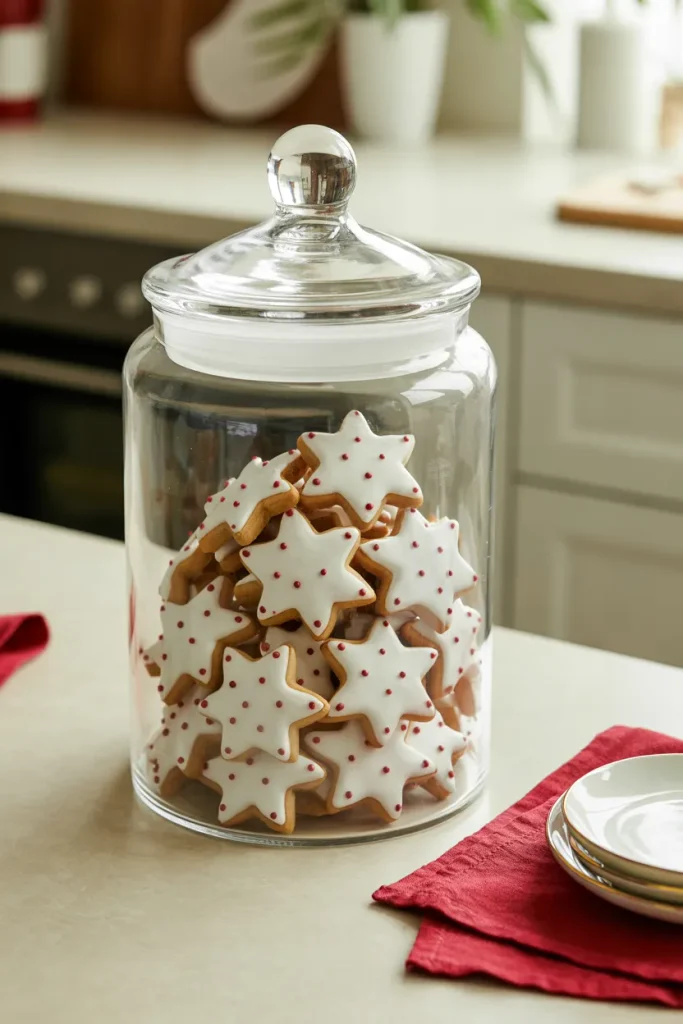
- Make Christmas baking part of the display with stacked star cookies whose iced edges remain visible through the glass.
- Choose a clean, dry jar intended for food storage, with an opening wide enough to retrieve cookies without breaking their points.
- Let cookies cool and icing set completely before stacking, so the decorations stay intact.
- Keep the arrangement entirely edible inside the jar. Tie decorative ribbon around the outside of the neck.
- Place a small serving plate beside the jar so guests have somewhere to set their chosen treats.
Stack cookies in short columns rather than filling the jar to its lid, and avoid pressing delicate points against the sides. For longer storage, use an airtight container appropriate to your recipe and refill the display for serving. A modest batch keeps the cookie arrangement easy to manage during gatherings.
Conclusion
A festive display does not need to take over the room to feel special. These christmas apothecary jar decorating ideas give everyday corners a little color, sparkle, and personality, whether you prefer woodland textures, nostalgic miniatures, or bright peppermint stripes.
Choose one jar, check what fits through its opening, and gather a few supplies in colors you love. Leave enough space for the details to show. Save this post on Pinterest so your favorite arrangements are easy to find, and share it with someone planning their Christmas decor. Pick your first idea and give that empty jar a festive purpose.